Migrating Extracted Content to SharePoint 2010 using Kapow Design Studio


In a previous serious of posts, I described the steps taken to migrate Lotus Notes content from a Sandbox database to the local Kapow database. At this point, I could use Kapow robots to transform the local content in place. However, I am going to skip to the next step and migrate the content to a SharePoint 2010 list.

I am still running Kapow Design Studio.

SharePoint List

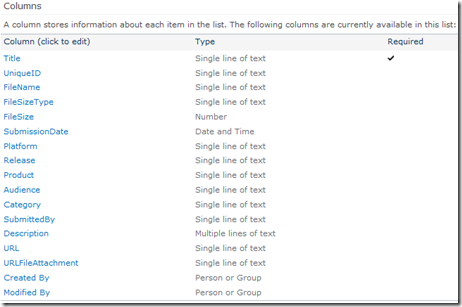
I created a simple list named “SandBox” in SharePoint 2010. I do not really need to copy content for all of the columns; but I am doing it anyway just as an example.

clip_image001

I modified the All Items view to show content more relevant to what I migrated.

clip_image003

Creating the migration robot

Select the “Lotus Notes Sandbox Migration” project.

clip_image004

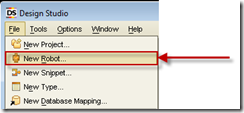
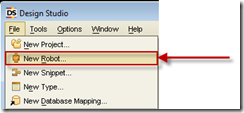
Create a new robot

clip_image005

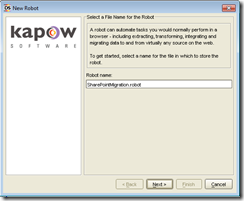
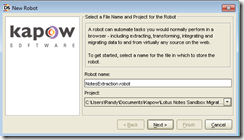
Enter “NotesExtraction.robot” as the robot name and click [Next] to continue.

clip_image006

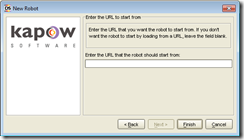
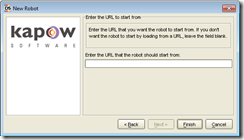
You can leave the URL blank for now. Click [Finish] to continue.

clip_image007

Below is a screenshot of the robot we want to create.

clip_image009

Load Page Step

I create the first step by right clicking on the “x” in the robot view window.

clip_image010

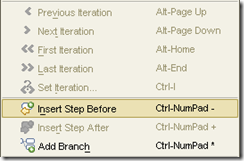
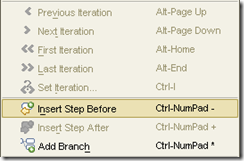
Click on [Insert Step Before] in the drop-down list.

clip_image011

The new step appears as “Unnamed”.

clip_image012

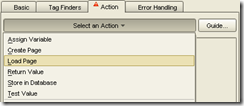
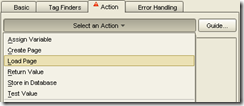
Click on [Select an Action] and then on the [Load Page] option in the Action tab in the Step view.

clip_image013

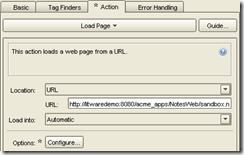
Enter the URL from which you want to start loading content to. In this example, I start from a SharePoint list view.

http://win-q085cbbhm02/sites/TestTeamSite/Lists/SandBox/AllItems.aspx

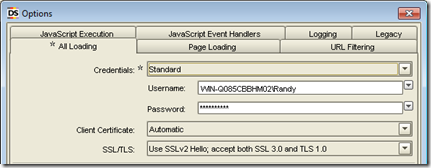
Click on [Configure] beside “Options”. The Options dialog box opens in the workspace. I have a Username and Password entered because I set my SharePoint web application to not allow anonymous access. Click [OK] to close the Options dialog box after setting the credentials.

clip_image014

Click on the “x” in the robot view window after you enter your URL.

clip_image010[1]

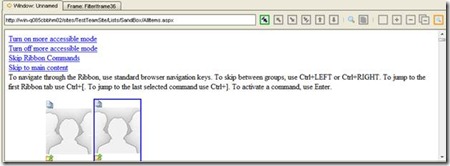
The contents of the web page at the URL should load in the Windows view for you to see.

clip_image016

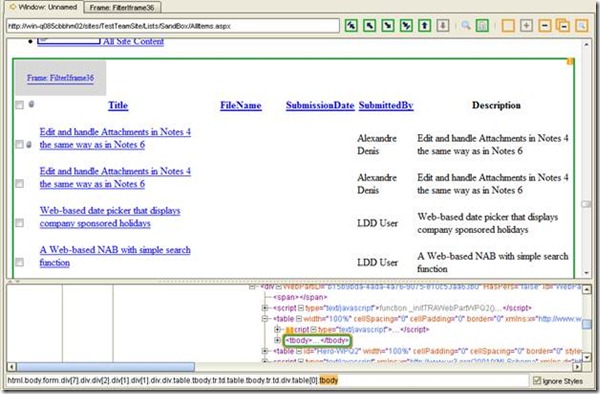
The HTML in the web page is displayed in the HTML view. Note that I have the “Ignore Styles” checkbox checked.

clip_image018

You can select HTML tags in either window and see the selection in both windows.

Query the Database

I need to query the database where all of the content was extracted to. Right-click on the “x” in the robot view window and click on “Insert Step Before”.

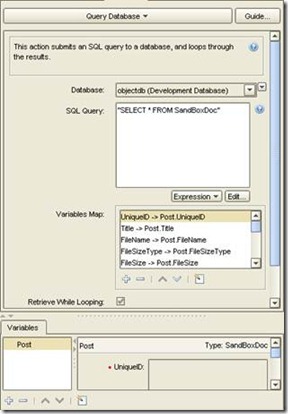
The new Click step should appear as below. Note how the current tags that were defined earlier continue be used. The new Step should appear. Update the step on the Action tab as seen below. Database is set to the objectdb and a SQL statement is added. Note that the Post variable is added to Variables. Then the variables are mapped in the Variables Map section.

Step

Tag Finders

Action

Query Database

clip_image020

clip_image022

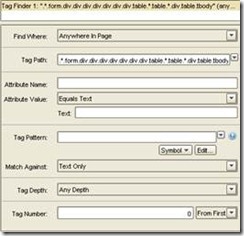
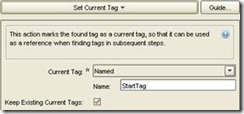
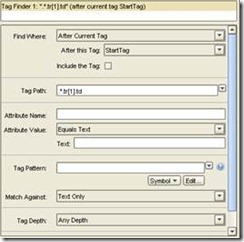
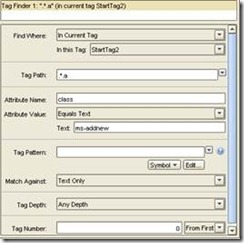
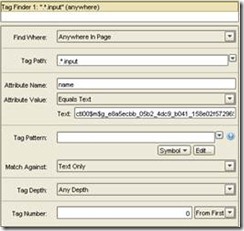
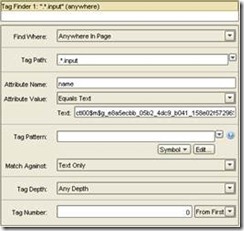
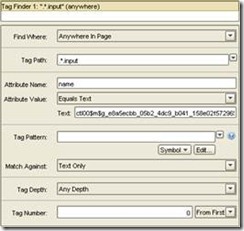
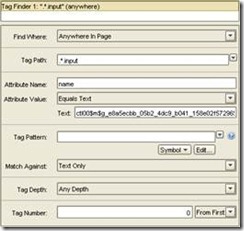
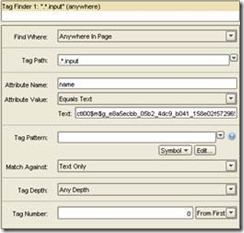
Next, I need to get to the current tag. I created the table below to show how I got to the correct starting tag. Note how I name a tag in the “Name” field in the Action of step 1. Then I reference the tag name in the “In this Tag” field in the Tag Finders of step 2. This process repeats itself in each step. Only the first step refers to “Anywhere in Page” for the “Find Where” value for Tag Finders. All of the remaining steps refer to “In Current Tag”. That is how I drilled down through the HTML to get to the correct starting tag.

Note also that the first tag starts as seen in the image below. The image shows some content that I added in testing the migration robot. You should have the “Ignore Styles” checkbox checked to see the HTML without styles.

clip_image024


Step

Tag Finders

Action

1

clip_image026

clip_image028

2

clip_image030

clip_image032

3

clip_image034

clip_image036

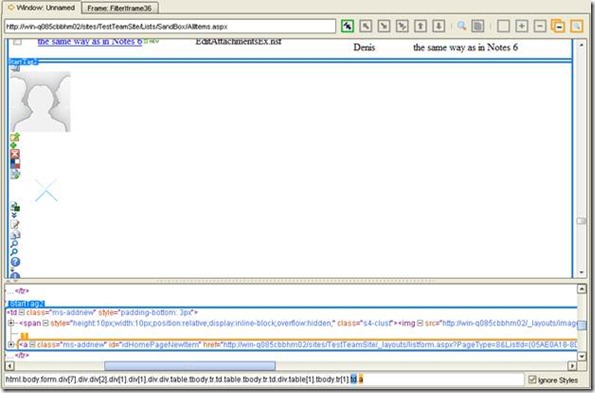
The final start tag step should place the starting point as seen in the image below. This basically places us close to where the [Add New Item] tag is.

clip_image038

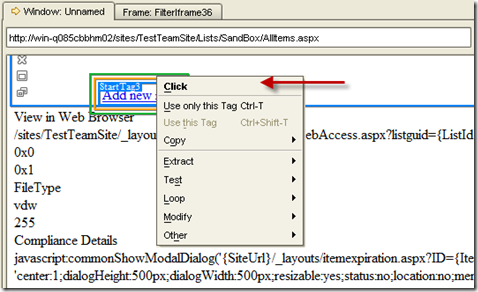
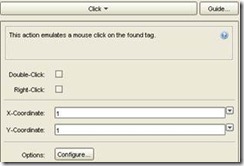
Scroll down in the HTML window and look for the “Add new item” text. Right-click on it and select “Click” on the drop-down menu.

clip_image039

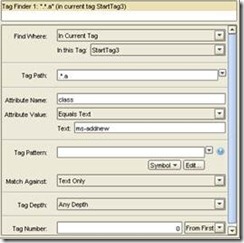
The new Click step should appear as below. Note how the current tags that were defined earlier continue be used.

Step

Tag Finders

Action

Click

clip_image041

clip_image043

I had to enter the credentials again by clicking on [Configure] beside Options. I clicked OK when I was done.

clip_image044

Right clicking on the “x” in the robot view window.

clip_image010[2]

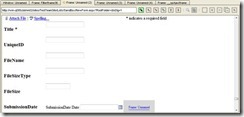
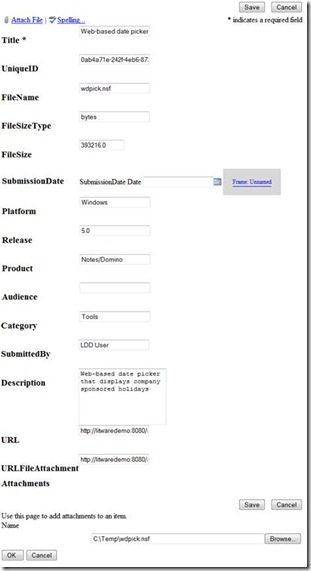
This will load the “New Item” screen. Scroll down the HTMO window named “Unnamed (2)” or something like that. It should be the newest window tab displayed. Look for the HTML fields as seen in the image below.

clip_image046

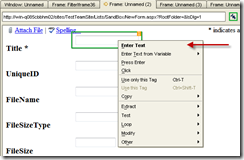
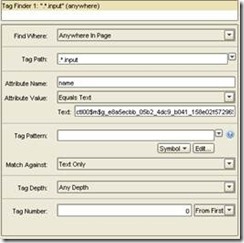
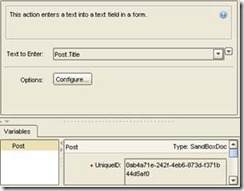
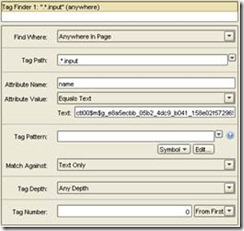
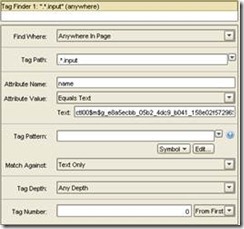
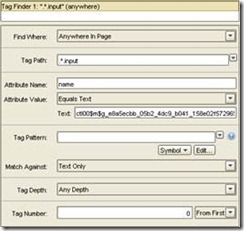
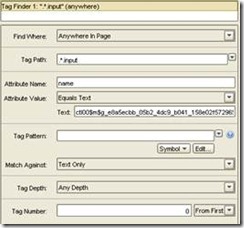
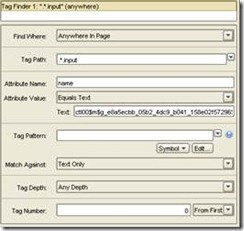
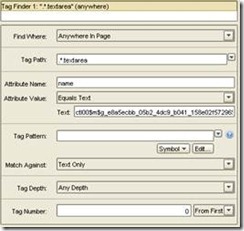
I created a series of steps to enter the text values into the HTML fields. Basically, I right-click in each field and select the “Enter Text” option to create each step. I select the applicable item from the Post variable for “text to enter”.

clip_image047

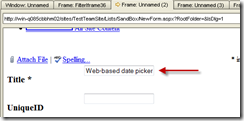
As you create each step, you should see the text inserted into the applicable field.

clip_image048

I created the following steps.

Step

Tag Finders

Action

Enter Title

clip_image050

clip_image052

Enter Unique Id

clip_image054

clip_image056

Enter File Name

clip_image058

clip_image060

Enter File Size Type

clip_image062

clip_image064

Enter File Size

clip_image066

clip_image068

Enter Platform

clip_image070

clip_image072

Enter Release

clip_image073

clip_image075

Enter Product

clip_image077

clip_image079

Enter Category

clip_image081

clip_image083

Enter Submitted By

clip_image085

clip_image087

Enter Description

clip_image089

clip_image091

Enter URL

clip_image093

clip_image095

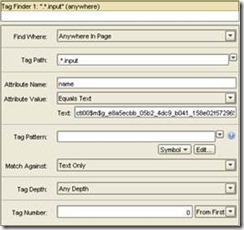
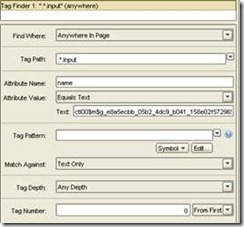
Enter Url File Attachment

clip_image097

clip_image099

Grouping Steps

I grouped the steps by first selecting them with the mouse in the robot editor view.

clip_image101

Then click the [Group] button in the action bar. Enter a name “Enter Item Values” for the group and hit [Enter] on your keyboard.

clip_image102

You can now collapse and expand the group in the robot editor view by clicking on the [-+] button in the group.

clip_image103

Selecting File Attachment

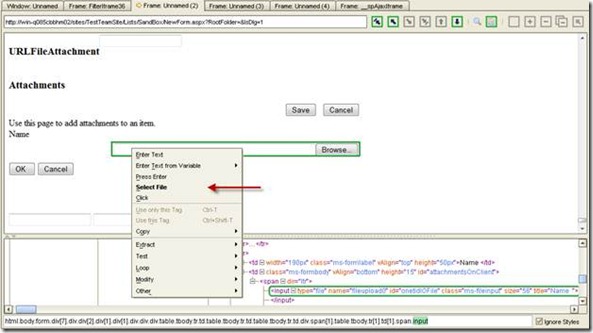
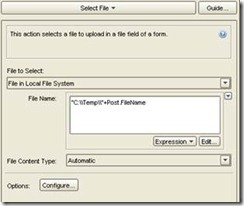
Scroll down the HTML window until you see the section for adding a file attachment. Right-click on the Browse button and field so that both are selected. Click on the “Select File” option in the drop-down menu.

clip_image105

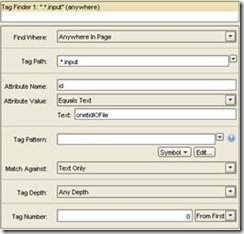
The new Select File step should appear as below. Note that you need to set file selection options to find the correct file. The original extraction robot extracted file attachments to the local file system in the C:\Temp directory. The filename string value was stored in the Post object.

Step

Tag Finders

Action

Click

clip_image107

clip_image109

I remember that some file attachments were missing from the extraction process. The error handling for this step should skip files that do not exist in C:\Temp.

clip_image110

Updated Screen

I should now see values in almost every field in the web page. At least, values for those fields that had corresponding values in the local database.

clip_image112

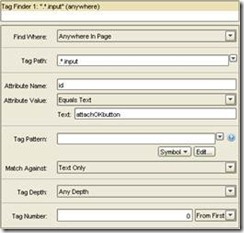
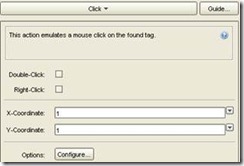
Right-click on the [OK] button and select the “Click” option. The new Click OK step should appear as below.

Step

Tag Finders

Action

Click

clip_image114

clip_image116

The error handling for this step should be the same as for the previous step.

clip_image110[1]

Right-click on the [Save] button and select the “Click” option. The new Click Save step should appear as below.

Step

Tag Finders

Action

Click

clip_image118

clip_image119

The error handling for this step should be the same as for the previous two steps.

clip_image110[2]

I had to enter the credentials again by clicking on [Configure] beside Options. I clicked OK when I was done.

clip_image044[1]

Click on the “x” in the robot view window to end processing.

clip_image010[3]

Save the robot.

Open a web browser to the SharePoint list and see if you added a new entry with the robot.

clip_image121

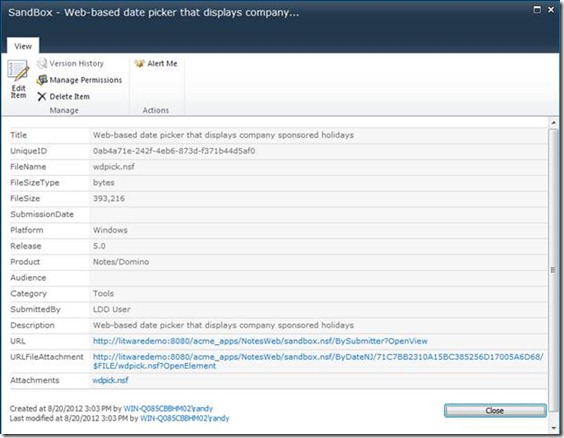
Click on the list item to see all of the details. All of the details from the original Notes database document are now in the SharePoint list. The URL’s still point to the Notes database. Normally, I would not have copied those over; but I did so here just as an example. I could also have run a transformation robot to update the URLs to point elsewhere.

clip_image123

I can open the file attachment by clicking on “wdpick.nsf” at the bottom of the page. Note that I did not recreate the confirmation page that existed in the Notes application. Instead, I attached the file attachment to the main document it belongs to. That was my choice to keep things simple here.

Also, I did not try to implement any document-level security that may have existed in the Lotus Notes application. I could also improve the user experience by creating a custom form for the list. I could also save the file attachments in a separate folder and link to them.

Conclusion

Many thanks to the Kapow support team for helping me through this process. I’m sure that they know better ways for some of the above steps. I did learn a lot using this hands-on approach. This effort was a great way to see how this content migration tool works.
Creating a Migration Robot in Kapow Design Studio – Part 5 of 5

Four more steps to add!

clip_image001

The hyperlink needs to be clicked to get to the “Download Agreement” web page. You may need to right-click it then click on the [Click] option. This creates a step that you can later delete.

clip_image002

You should see the “Download Agreement” web page.

clip_image004

Scroll down the web page until you see the “I have read and accept the terms and conditions” hyperlink.

clip_image005

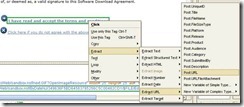
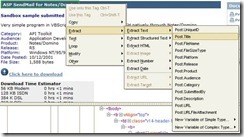
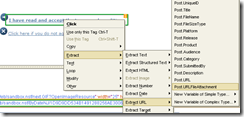
Right-click on the hyperlink and select the [Extract \ Extract URL \ Post.URL] option.

clip_image007

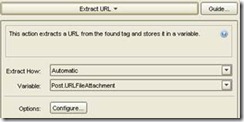
A new step is created and it should appear like below.

Step

Tag Finders

Action

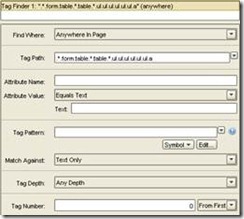
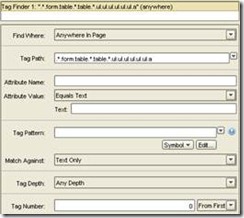
Extract File URL

clip_image009

clip_image011

Right-click on the “Extract File URL” step and select [Insert Step After].

clip_image012

A new step is created. Change the name of the step on the Basic tab to “Assign Variable” and it should appear like below.

Step

Tag Finders

Action

Extract File URL

clip_image014

clip_image016

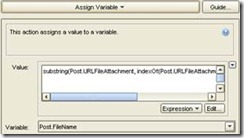
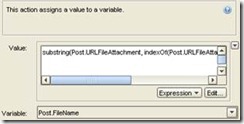
The text in the Value text field appears as follows:

substring(Post.URLFileAttachment, indexOf(Post.URLFileAttachment, "$FILE/")+6, length(Post.URLFileAttachment)-12)

Right-click on the “Assign Variable” step and select [Insert Step After].

clip_image012[1]

A new step is created. Change the name of the step on the Basic tab to “Extract File Attachment” and it should appear like below.

Step

Tag Finders

Action

Extract File URL

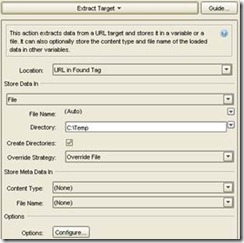
clip_image018

clip_image020

This step is extracting the file attachment and saving it with the same filename to the C:\Temp directory.

Right-click on the “Extract File Attachment” step and select [Insert Step After].

clip_image012[2]

A new step is created. It should appear like below.

Step

Tag Finders

Action

Extract File URL

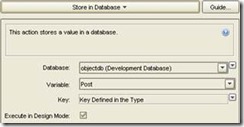
clip_image014[1]

clip_image022

The “Store in Database” step saves the record to the database for future use.

Grouping Steps

I grouped the steps by first selecting them with the mouse in the robot editor view.

clip_image024

Then click the [Group] button in the action bar. Enter a name for the group (e.g. Extract File Attachment) and hit [Enter] on your keyboard.

clip_image025

You can now collapse and expand the group in the robot editor view by clicking on the [-+] button in the group.

clip_image026

Save the Robot

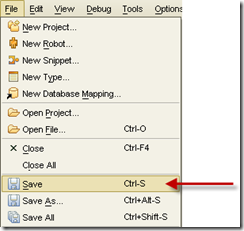
Save the robot by clicking on File \ Save in the menu.

clip_image027

Next: I have to document and publish the steps to migrate the content that I just extracted to a SharePoint 2010 server. I have done the migration already; but I need to record it here.

Many thanks to the Kapow support team for helping me through this process. I’m sure that they know better ways for some of the steps. I did learn a lot using this hand-on approach.

Creating a Migration Robot in Kapow Design Studio – Part 4 of 5

Loop Execution

There are two types of loops that I need this robot to execute. The first loop requires clicking on the hotspot for each record displayed in the view. The second loop requires clicking on the [Next] hotspot to open the next list of records in the web browser.

clip_image001

Looping through the records listed in the view took a while for me to figure out. The problem was that there were so many similar tags for the robot to choose from. I had to make sure that the action step was properly defined. I ended up asking for help from Kapow Support.

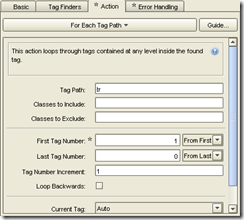
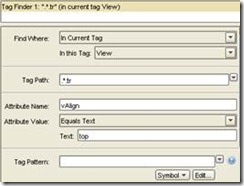
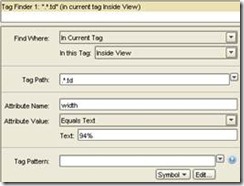
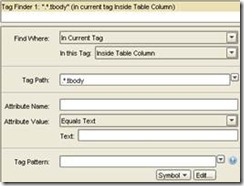
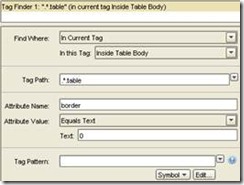
I created a new tag after the snippet that I just created. I used the “For Each Tag Path” action and set the tag path to “tr”. Of course, “tr” refers to a table row tag in a table. I set the First Tag Number to “1” to skip the first “tr” because it did not contain a hotspot that opened a record.

clip_image002

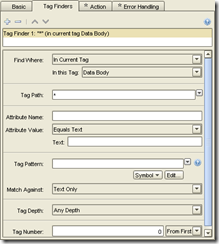
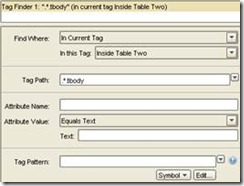
Now click on the “Tag Finders” tab. I set the “Find Where” value to “In Current Tag” and set the “In this Tag” value to “Data Body”. You may recall that step 6 in the “Move to Starting Tag” had the “Name” property set to “Data Body”.

clip_image004

The “Tag Path” property is set to “*”.

clip_image005

The second loop actually appears as a branch prior to the “For Each Tag Path” step that I just created. I right-click on the “Move to Starting Tag” step and select [Add Branch].

clip_image006

I click on the “x” at the end of the new branch.

clip_image007

I scroll down the web browser window until I see the [Next] hotspot.

clip_image008

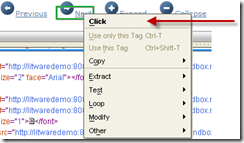
I right-click on the [Next] hotspot and select [Click] in the drop-down menu.

clip_image009

The new Click step should appear as below. Note how the current tags that were defined earlier continue be used.

Step

Tag Finders

Action

Click

clip_image011

clip_image013

There is one other thing about the “Click Next” step. I modified the “Error Handling” tab to “Ignore and Continue” when there is an error. So the robot should end when there is no [Next] hotspot to click.

clip_image014

Now insert the snippet that was created earlier. We need to get back to the same starting tag after the new web page opens.

Right-click on the “Click URL” step and select [Insert Snippet Step After].

clip_image015

The step appears as “Unnamed”.

clip_image016

Click on the “Select a Snippet” button on the Snippet tab and select the “Moving_to_Starting_Tag” option. The step appears correctly with the snippet name.

clip_image017

I click on the arrow at the end of the new branch. The arrow connects the “Move to Starting Tag” step and the “x”.

clip_image018

I click on the endpoint of the arrow and drag and drop it onto the circle that appears in front of the “For Each Tag Path” step.

clip_image019

This completes the second loop. The “Click Next” step will run every time that the “For Each Tag Path” loop runs out of hotspots to click.

Click URL Step

Next I created the “Click URL” step. I selected the first hotspot that opened a record in the web browser window.

clip_image020

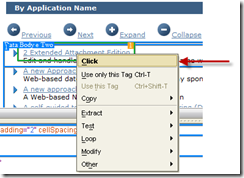
I right-clicked on the hotspot and selected “Click” in the drop-down list.

clip_image021

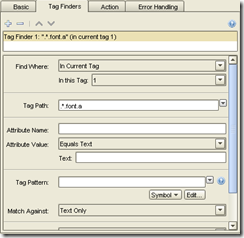
This creates a Click action step. The Tag Finders tab appears as below.

clip_image022

Note that the “In this Tag” property value is “1”. This is the current highlighted tag.

clip_image023

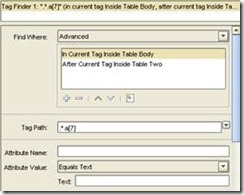
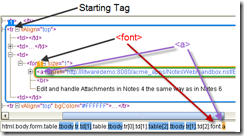
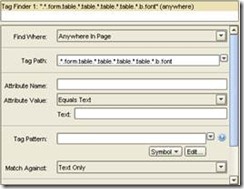
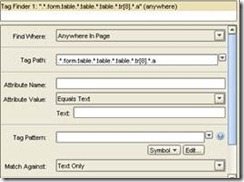
The “Tag Path” value is “.*.font.a.”. You can see that the tag path points to the correct hotspot in the selected <tr>.

clip_image024

Extract Field Values

Now we need to extract the field values from the source document. The “Click URL” step opened a web page with Notes document details.

clip_image025

I want to capture these values and store them in a local database. I start by clicking on the text in the blue banner at the top. The text is highlighted in green.

clip_image026

The same HTML is also highlighted in the HTML View window.

clip_image027

Right-click on the selected text and click on Extract \ Extract Text \ Post.Title.

clip_image029

The extraction step is created with everything that you need in place!

Step

Tag Finders

Action

Extract Title

clip_image031

clip_image033

Repeat this for the following fields: Title, Description, Submitted By, Category, Audience, Product, Release, Platform, Submission Date, File Size, File Size Type, and URL. You should end up with a group of steps that appears as below.

clip_image035

Note the following:

· I grouped my steps together in a group named “Extract Field Values”.

· I changed the Error Handling for the “Extract Submission Date” and “Extract File Size” steps to log an error and then “Ignore and Continue”.

clip_image036

· The File Size Type value is likely always going to be “bytes”.

· The URL value is the “Click here to download” URL

clip_image037

Assign Unique ID

Right-click on the new group of tasks that you created and click on [Insert Step After].

clip_image038

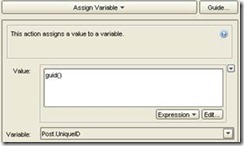
Set the name of the new step to “Assign UniqueID”. No change to Tag Finders. Set the action to “Assign Variable”. Set the value to guid() and assign to Post.UniqueID. This will set a unique guid value to the UniqueID column in the row of data.

Step

Tag Finders

Action

Assign Unique ID

clip_image040

clip_image042

Extract the File Attachment

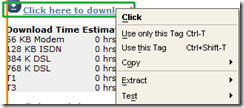
Right-click on the “Click here to download” hotspot.

clip_image043

Click on the Click option in the drop-down list.

clip_image044

A new step is created. Edit the Step Name to “Click Here to Download” on the Basic tab. Editing the remaining properties should not be required; but the values are provided below for your benefit.

Step

Tag Finders

Action

Click Here

clip_image046

clip_image048

Click on the “x” in the robot view window.

clip_image049

The contents of the web page at the URL should load in the Windows view for you to see.

clip_image051

Scroll down to the bottom of the window.

clip_image052

Right-click on the “I have read and accept the terms and conditions” text and click on the Extract \ Extract URL \ Post.URLFileAttachment options.

clip_image053

A new step is created. Rename the step to “Extract File URL”.

Right-click on the “Extract File URL” step and click on the “Insert Step After” option.

Set the name of the new step to “Assign Variable”. No change to Tag Finders. Set the action to “Assign Variable”. Set the value to:

substring(Post.URLFileAttachment, indexOf(Post.URLFileAttachment, "$FILE/")+6, length(Post.URLFileAttachment)-12)

and assign to Post.FileName. This will get the filename value from the URL and save it to a column value. The filename will later be used to find the file and load it to the target list on SharePoint.

Step

Tag Finders

Action

Assign Variable

clip_image040[1]

clip_image055

Right-click on the “I have read and accept the terms and conditions” text and click on the Click option in the drop-down list.

clip_image044[1]

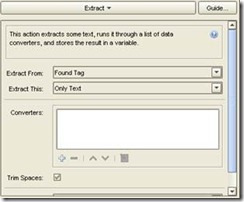
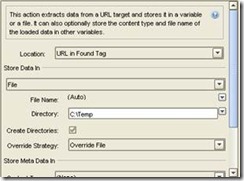
A new step is created. Edit the Step Name to “Extract File Attachment” on the Basic tab. No change to Tag Finders. Set the action to “Extract Target”. Set the values on the Action tab to be the same as those displayed in the table below.

This will extract the file and save it locally in the C:\Temp folder. The file will later be loaded to the target list on SharePoint.

Step

Tag Finders

Action

Extract File Attach-ment

clip_image057

clip_image059

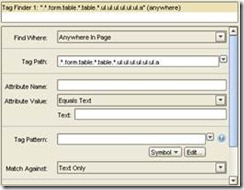
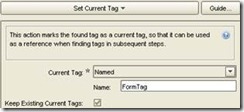
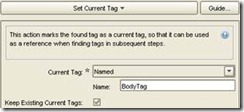
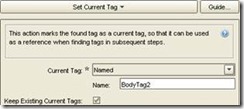
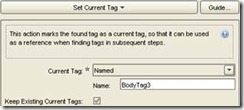
Unfortunately, I did run into problems with finding the right tag to extract the files because the HTML is never quite the same from one web page to the next. So I had to set a series of “Set Current Tag” steps to get to the correct starting tag.

clip_image060

The details of each step are displayed below.

Step

Tag Finders

Action

Set Current Tag

clip_image062

clip_image064

Set Current Tag

clip_image066

clip_image068

Set Current Tag

clip_image070

clip_image072

Set Current Tag

clip_image074

clip_image076

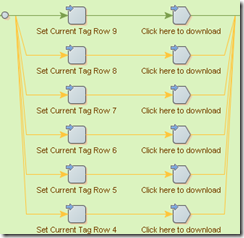
Then I had to set a loop to test and get to the correct table row. I am sure that there is a better way; but this will do for now. Basically, I created steps that go row by row looking for the URL to click on. The robot skips to the next row if there is an error. I hard-coded the table row reference.

clip_image077

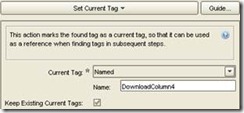
The details of the first two steps are displayed below. The process repeats itself for the remaining steps. The Tag Path changes to refer to the next table row # (e.g. tr(4)). The name of the current tag includes the row # (e.g. DownloadColumn4).

Step

Tag Finders

Action

Set Current Tag Row 4

clip_image079

clip_image081

Click here to download

clip_image083

clip_image085

The Error Handling tag is the same for every step. Basically, ignore the error and continue.

clip_image086

Creating a Migration Robot in Kapow Design Studio – Part 3 of 5

Creating the extraction robot

Select the “Lotus Notes Sandbox Migration” project.

clip_image001

Create a new robot

clip_image002

Enter “NotesExtraction.robot” as the robot name and click [Next] to continue.

clip_image003

You can leave the URL blank for now. Click [Finish] to continue.

clip_image004

Below is a screenshot of the robot we want to create.

clip_image006

Load Page Step

I create the first step by right clicking on the “x” in the robot view window.

clip_image007

Click on [Insert Step Before] in the drop-down list.

clip_image008

The new step appears as “Unnamed”.

clip_image009

Click on [Select an Action] and then on the [Load Page] option in the Action tab in the Step view.

clip_image010

Enter the URL from which you want to start reading content from. In this example, I start from a Notes view.

http://litwaredemo:8080/acme_apps/NotesWeb/sandbox.nsf/ByApplicationName?OpenView

clip_image011

Click on [Configure] beside “Options”. The Options dialog box opens in the workspace. I do not have a Username or Password entered because I set my Notes database to allow anonymous access. Click [Cancel] to close the Options dialog box.

clip_image012

Click on the “x” in the robot view window after you enter your URL.

clip_image007[1]

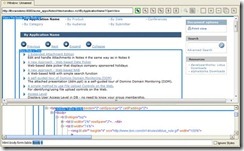
The contents of the web page at the URL should load in the Windows view for you to see.

clip_image014

The HTML in the web page is displayed in the HTML view.

clip_image016

You can select HTML tags in either window and see the selection in both windows.

Add the SandBoxDoc Type

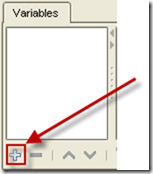
Add the type that we created earlier to the “Load Page” step. Click on the “Basic” tab and click on the “+” in the Variables tab at the bottom of the window.

clip_image017

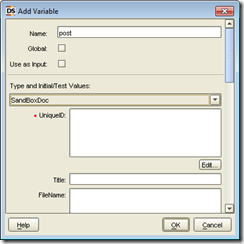
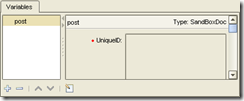
The “Add Variable” dialog box opens in the workspace. Enter a name for the variable. I used “post” because that was what was used in the tutorials. Select the SandBoxDoc type in the “Type and Initial/Test Values” drop-down list. You will see the type properties displayed in the dialog box after selecting the SandBoxDoc type. Click [OK] to continue.

clip_image018

The “SandBoxDoc” type appears as a variable. The “post” properties are displayed when the post variable is selected.

clip_image019

Move to Starting Tag Snippet

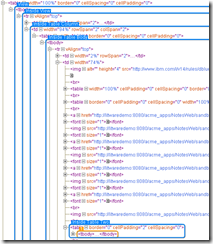
Unfortunately, I had a lot of trouble getting to the right starting tag in the view. I believe that it has a lot to do with how Lotus Notes generates web pages. Basically, I had to drill down to the place in the web page that you see below: <tbody>. But there were several tbody’s along the way!

clip_image021

I created a series of steps to drill down to the correct starting tag. I grouped these tags together and then saved them as a snippet called “Move_to_Starting_Tag.snippet”.

clip_image023

I had to start near the <form> tag inside the <body> tag. The “1” below shows where I set the first tag.

clip_image024

The sixth tag is deep inside the first tag – inside a few tables. It is highlighted below with a “1”.

clip_image025

Maybe there is an easier way to drill down; but this way worked.

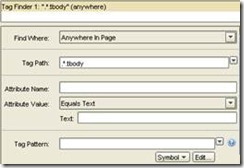
I created the table below to show how I got to the correct starting tag. Note how I name a tag in the “Name” field in the Action of step 1. Then I reference the tag name in the “In this Tag” field in the Tag Finders of step 2. This process repeats itself in each step. Only the first step refers to “Anywhere in Page” for the “Find Where” value for Tag Finders. All of the remaining steps refer to “In Current Tag”. That is how I drilled down through the HTML to get to the correct starting tag.

Step

Tag Finders

Action

1

clip_image027

clip_image029

2

clip_image031

clip_image033

3

clip_image035

clip_image037

4

clip_image039

clip_image041

5

clip_image043

clip_image045

6

clip_image047

clip_image049

You will need to create these steps after the Load Page step.

Grouping Steps

I grouped the steps by first selecting them with the mouse in the robot editor view.

clip_image051

Then click the [Group] button in the action bar. Enter a name for the group and hit [Enter] on your keyboard.

clip_image052

You can now collapse and expand the group in the robot editor view by clicking on the [-+] button in the group.

clip_image053

Convert Group to Snippet

I selected the group and clicked on the [Convert group to snippet] action button in the action bar.

clip_image054

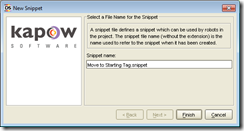
The New Snippet dialog box opens up in the workspace. Enter a name for the snippet and click [Finish] to continue.

clip_image055

Creating a Migration Robot in Kapow Design Studio – Part 2 of 5

Adding a Database to the Project

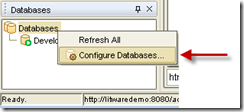
First add a new database by right-clicking on “Databases” in the “Databases” window in the bottom left of the Design Studio workspace.

clip_image001

A new “Settings” dialog box appears. Click on the “Database Connections” tab.

clip_image002

Click on the “+” symbol in the bottom left of the dialog box.

clip_image003

An “(Unnamed)” entry appears in the list.

clip_image004

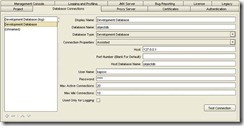
Fill in the database properties for “(Unnamed)” so that it matches what I have for “Development Database”.

clip_image006

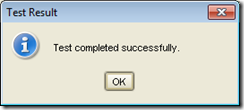
Click on [Test Connection]. The test should complete successfully. Click [OK] to close the “Test Result” message box.

clip_image007

Click [OK] to close the “Settings” dialog box.

Right-click on the “Development Database in the Databases window and click on the Add to Project \ Lotus Notes Sandbox Migration option.

clip_image008

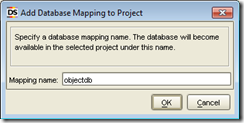
The “Add Database Mapping to Project” dialog box opens. Click [OK] to continue.

clip_image009

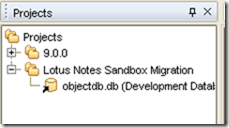
The “objectdb.db (Development Database)” now appears as part of the project.

clip_image010

Adding a Table to the Database Based on the Type

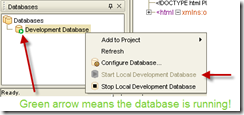
Make sure that your database is running. Check that the green arrow is beside your database. If not, you will need to start the Local Development Database.

clip_image011

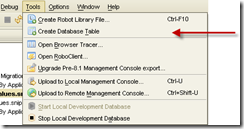
Select the project in the project window and click on Tools \ Create Database Table.

clip_image012

Select the objectDB database and the SandBoxDoc type.

Check Add Drop table if you want Design Studio to drop the table if it already exists.

clip_image013

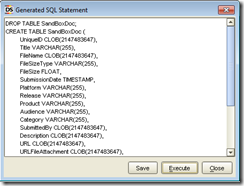
Click [Generate SQL] if you want to create the new table. Click [Execute] to run the SQL.

clip_image014

Click [Close] to close the “Create Database Table” dialog box.

Creating a Migration Robot in Kapow Design Studio–Part 1 of 5

I will describe the steps taken to migrate Lotus Notes content from a Sandbox database to a SharePoint custom list. I have attempted to record every step and action taken as best as possible.

  • Running Kapow Design Studio
  • Creating a new project
  • Adding a database to the project
  • Creating a new type to define the data source and database table
  • Creating the extraction robot
  • Debugging the extraction robot
  • Creating the migration robot
  • Debugging the migration robot

The first five parts show the steps taken to read the content and store it to a local database using Kapow Design Studio.

Running Kapow Design Studio

I am running Kapow Studio in a VMWare virtual machine:

  • Windows 7 Enterprise 64-bit
      • Intel Core Duo CPU 2.8GHz
      • 4GB Ram
  • Lotus Notes 8.5
  • SharePoint Server 2010
  • Microsoft Office Professional Plus 2010 32-bit

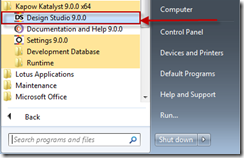
Open Kapow Design Studio in your Windows

clip_image001

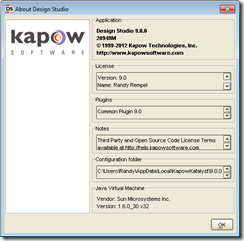
I am running Kapow Design Studio 9.0

clip_image002

Creating a New Project

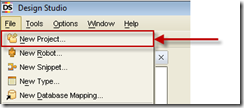
Start a new project

clip_image003

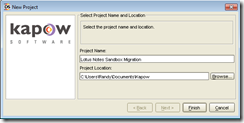
Enter “Lotus Notes Sandbox Migration” as the project name and click [Finish]

clip_image004

Creating a New Type to Define the Data Source and Database Table

Select the “Lotus Notes Sandbox Migration” project.

clip_image005

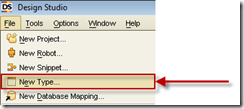
Create a new type in the project.

clip_image006

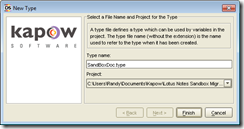
Enter SandBoxDoc.type as the type name. Click [Finish] to continue.

clip_image007

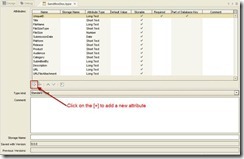
The attributes window opens in the workspace. I added the attributes for this demo.

clip_image009

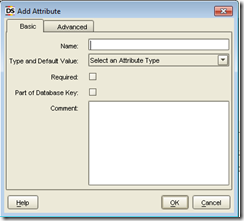
Click on the [+] to add a new attribute. You will need to add the attributes that you see listed in the previous screen. Enter the name and type for each attribute. The UniqueID is required and part of database key. Click [Ok] to close the “Add Attribute” dialog box for each attribute.

clip_image010

You can double-click on an attribute in the attributes list to edit it again.

I will refer to the SandBoxDoc.type again. Click on the [X] in the tab to close the SandBoxDoc.type window for now.

clip_image011