Installing and Configuring the Lotus Notes Connector for SharePoint 2013 Server: Part 2 of 2

I am ready to start the Lotus Notes connector on the SharePoint 2013 Server. In this second of two blog entries, I execute the steps to:

  • Start the Lotus Notes Connector service
  • Register Lotus Notes with the service
  • Setup and start the crawler
  • Setup, start, and configure the metadata service
  • Create a Search Center site
  • Refine the Lotus Notes search results

This is a copy of the blog post that I originally posted here:

Installing and Configuring the Lotus Notes Connector for SharePoint 2013 Server: Part 2 of 2

I continue to follow along the steps as detailed here: http://technet.microsoft.com/en-us/library/jj591606.aspx. However, I depart from the steps and do things a bit differently based on where I ran into problems and fixed them. I document everything in detail.

RHR (2013-05-05): I had to make a few corrections in this blog posting. I corrected the order below. Registering Lotus Notes with the Server has to be completed before starting the Lotus Notes Connector Service.

Register Lotus Notes with the Server

I open Explorer and click through the folders until I get to: C:\Program Files\Microsoft Office Servers\15.0\Bin\1033

image_thumb[110]

I double-click on the NotesSetup file. The Index Setup Wizard screen appears. I click Next to continue.

image_thumb[112]

The Register Lotus Notes screen appears. I enter the data as seen below. I enter the password for the Notes ID that I used to run the Lotus Notes client software. I do not check the Ignore Lotus Notes security while building an index checkbox. I click Next to continue.

Location of notes.ini file

C:\Lotus\Notes\notes.ini

Location of Lotus Notes install directory

C:\Lotus\Notes

image_thumb[163]

The Specify Lotus Notes Owner Field screen appears. I enter the details as seen below. I click Next to continue.

Lotus Notes server name 192.168.1.88
Lotus Notes database file name Mapping.nsf
View name Mappings
Lotus Notes field name column title UserID
Windows user name column title DomainAccount


image_thumb[118]

The Completing the Lotus Notes Index Setup Wizard screen appears. I click Finish to continue.

image_thumb[120]

The Microsoft SharePoint Server Configuration screen appears. The configuration succeeded!

image_thumb[165]

Start the Lotus Notes Connector Service

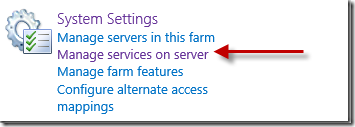
Open Central Administration and click on Manage services on server

image

Click Start on the Lotus Notes Connector service

image

The Lotus Notes connector settings screen appears. I select Create new application pool and enter Contoso Lotus Notes Crawl App Pool. I keep the security account and click Provision.

image

The Working on it message appears briefly

image

The Services on Server screen appears and the Lotus Notes Connector service has started.

image


Setup and Start the Crawler

I return to Central Administration and click on Manage service applications.

image_thumb[167]

Click on the search service application. I named mine Search Service Application.

image

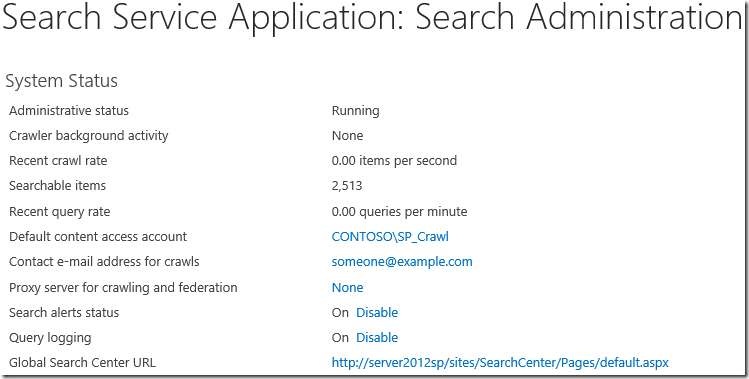
The Search Service Application: Search Administration screen opens.

image

Click on Content Sources

image_thumb[173]

The Search Service Application: Manage Content Sources screen appears. I started some work on crawling HTML files. Maybe I cover that in a future blog entry.

image

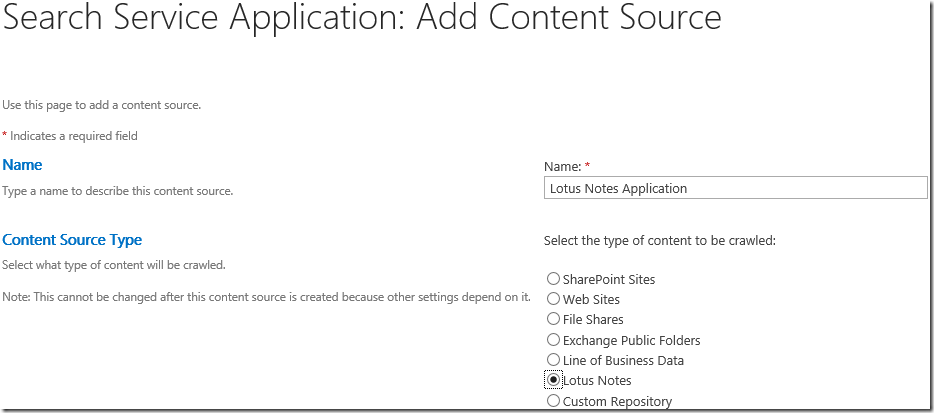
The Search Service Application: Add Content Source screen appears. I enter Lotus Notes Application as the Name. I select Lotus Notes as the type of content to be crawled.

image

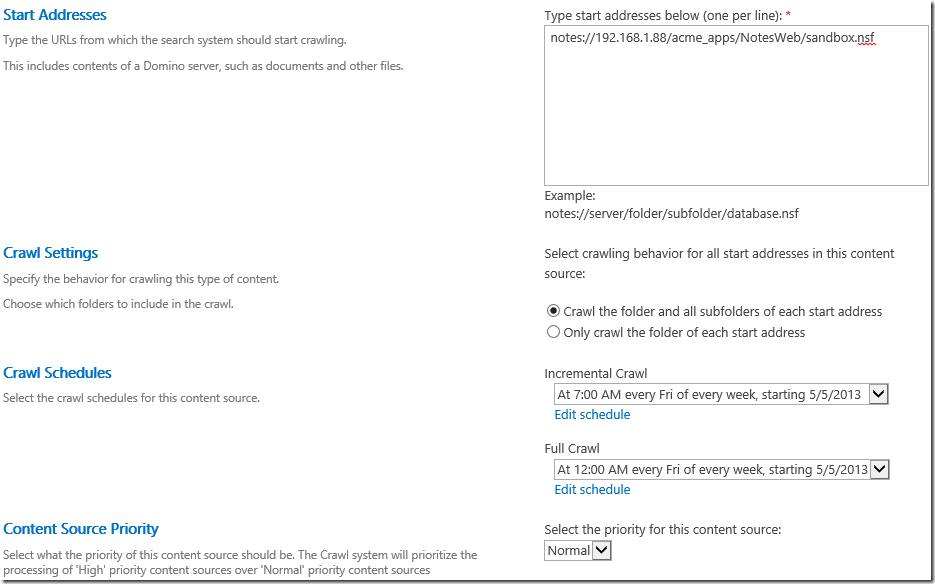
I set the Start Addresses to point to the Notes database that I opened earlier. I could add other Notes databases here, too. I also set the Crawl Settings, Crawl Schedules, and Content Source Priority. I click OK to accept the settings and continue.

image

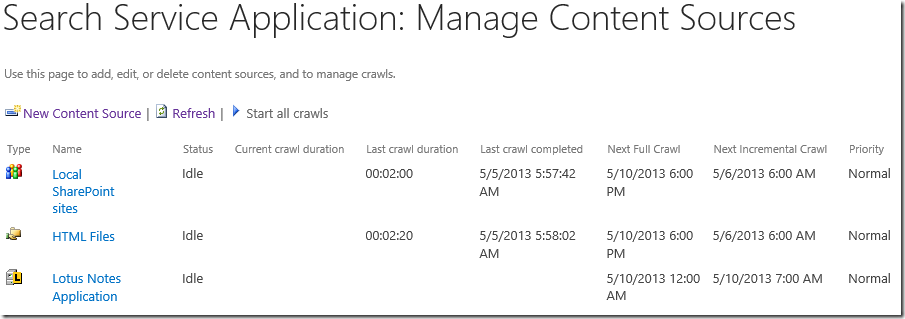
The new content source appears in the Manage Content Sources screen.

image

Setup, Start, and Configure the Metadata Service

I created a Metadata service while doing some other work. The steps to create one are listed below.

I return to Central Administration and click on Manage service applications.

image_thumb[185]

Click on New in the top left corner of the screen and Managed Metadata Service.

image_thumb[187]

The Create New Managed Metadata Service screen appears. I enter a Name and Database Server.

image_thumb[190]

I scroll down the screen. I select Use existing application pool and keep the remaining settings as is. I click OK to accept the edits and continue.

image_thumb[192]

The Managed Metadata services now appears in the list.

image_thumb[194]

I return to Central Administration and click on Manage services on server.

image_thumb[197]

Click on Start on the Managed Metadata Web Service.

image_thumb[199]

The service starts shortly afterwards. I return to Central Administration and click on Manage service applications.

image_thumb[200]

I click on Managed Metadata in the list of service applications.

image_thumb[202]

I had a problem one time with an error message appearing.

The Managed Metadata Service or Connection is currently not available. The Application Pool or Managed Metadata Web Service may not have been started. Please Contact your Administrator.

I checked that the Contoso App Pool application pool was started in IIS.

image_thumb[204]

I waited about 20 minutes and the message stopped appearing. I considered doing an IIS Reset; but it was not necessary. The Site Settings: Term Store Management Tool screen appeared.

image_thumb[206]

The service starts shortly afterwards. I return to Central Administration and click on Manage service applications.

image_thumb[207]

I click on my Search Service Application service application.

image

I then click on Content Sources on the left.

image_thumb[211]

The Search Service Application: Manage Content Sources screen appears. I click on Lotus Notes Application and then on Start Full Crawl.

image

I click OK on the message screen.

image_thumb[215]

The final status update appears as below after the crawling completes.

image

Create a Search Center Site in SharePoint Server 2013

I created a new Search Center site by executing the steps outlined here: http://technet.microsoft.com/en-us/library/hh582314.aspx

Refining the Lotus Notes Search Results

I open my Search Center site at http://server2012sp/sites/SearchCenter. I enter the word sharepoint in the search window and click on the search icon. The search results appear as below. I blanked out the last part of the last names of the authors. Also, you can see that the Notes document UNID is displayed as the document title.

image_thumb[221]

I found a blog entry (http://blogs.msdn.com/b/opal/archive/2010/02/16/crawl-lotus-domino-with-lotus-notes-connector-in-sharepoint-server-2010.aspx) that described how to replace the document UNID with the document Subject field. The steps to execute were for SharePoint 2010; but I’m going to show the steps for SharePoint 2013. I suspect that they are virtually the same anyway.

I return to Central Administration and click on Manage service applications.

image_thumb[222]

I click on my Search Service Application service application. I then click on Search Schema.

image_thumb[223]

The Search Service Application: Managed Properties screen appears. I click on Categories.

image

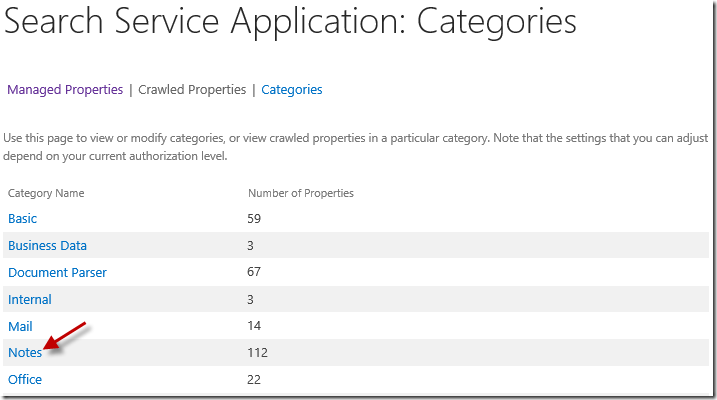
The Search Service Application: Categories screen appears. I click on Notes.

image

I want to use the Subject field for the document title. The Subject field appears to be the best match for the title based on the design of the form. The Subject appears at the top of the Lotus Notes form and a review of the data makes it seem to be the best match. The steps that follow will show how I implement using the Subject field.

image_thumb[243]

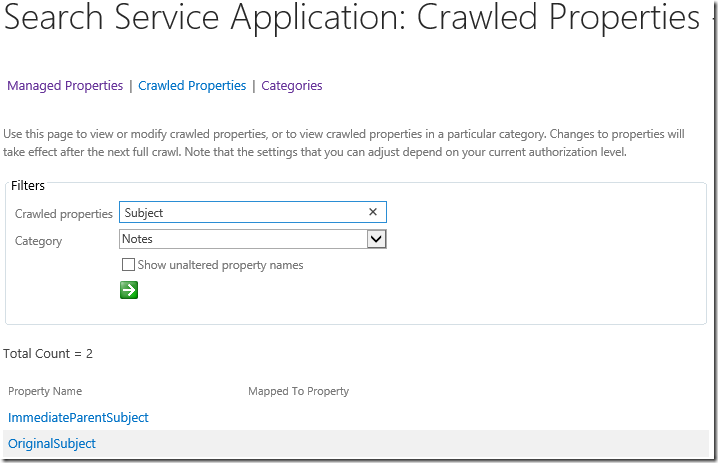
The Search Service Application: Crawled Properties – Notes screen appears. I enter Subject in the Crawled properties field and click on the green arrow box image_thumb[237]. The list of property names is filtered to include only those that contain the term Subject.

image

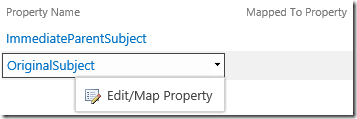
I click on OriginalSubject and then click on Edit/Map Property.

image

The Search Service Application: Edit Crawled Property: Subject screen appears. I can add mappings to the managed property on this screen.

image

I click on Add a Mapping. The Managed property selection screen appears. I scroll down the Select a managed property and select Title(text).

image

I click OK at the bottom of the screen (scrolling down a bit). Title(text) appears in the mapping list.

image_thumb[247]

I click OK to close the Search Service Application: Edit Crawled Property: Subject screen. I am returned to the Search Service Application: Crawled Properties – Notes screen appears. I enter Subject in the Crawled properties field and click on the green arrow box image_thumb[249]. The list of property names is filtered to include only those that contain the term Subject. I can see that Title is listed in the Mapped To Property column for Subject.

image

I click on Title. The Search Service Application: Edit Managed Property – Title screen appears.

image

I scroll down to the Mappings to crawled properties section and select Subject in the list.

image

I click on Move Up to move Subject to the top of the list. By moving Subject to the top, I am making sure that it is the first to be picked up and mapped to the Title. Otherwise, the document UNID will be displayed. I click OK to accept the changes and close the screen.

image

I click on Content Sources on the left side.

image_thumb[259]

The Search Service Application: Manage Content Sources screen appears. I click on Lotus Notes Forum and then click on Start Full Crawl.

image_thumb[261]

I click on OK on the confirmation prompt.

image_thumb[263]

The crawling starts.

image

The crawling completed after almost 14 minutes.

image

I open my Search Center site at http://server2012sp/sites/SearchCenter. I enter the word sharepoint in the search window and click on the search icon. One of the search results appear as below. You can see that the Notes document Subject is displayed as the document title.

image

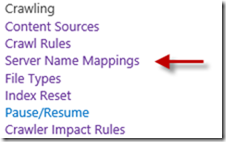
I have to add a Server Name Mapping for my Domino server. My Domino server uses port 8080 instead of port 80. I click on Server Name Mappings in the Search Service Application screen.

image

The Search Service Application: Server Name Mappings screen appears. I click on New Mapping.

image

The Search Service Application: Add Server Name Mappings screen appears. I add the name mapping as it appears below. I click OK to continue.

image

The mapping is displayed on the screen.

image

I run another full crawl on the Lotus Notes Application content source. I refresh the Search Results screen and the correct port number appears in the URL.

image

I click on the search result and the web page opens as expected.

image

I have an idea about building a search drive solution using the data stored in Lotus Notes databases. I saw some interesting solutions by a few SharePoint MVPs.

For now, this concludes my blog entry on installing and configuring the Lotus Notes Connector for SharePoint 2013. I hope that you found it helpful. You can read my other blog entries on how I installed and configured my SharePoint 2013 server environment.


Installing and Configuring the Lotus Notes Connector for SharePoint 2013 Server: Part 1 of 2

Installing and Configuring the Lotus Notes Connector for SharePoint 2013 Server: Part 2 of 2

Installing and Configuring the Lotus Notes Connector for SharePoint 2013 Server: Part 1 of 2

I am involved with Lotus Notes application migrations to SharePoint from time to time. I am looking for a solution that can keep some legacy Lotus Notes applications in place; but provide search capabilities to the legacy data to SharePoint 2013 users. This could be a very practical and cost-effective business solution to customers.

This is a copy of the blog post that I originally posted here:

Installing and Configuring the Lotus Notes Connector for SharePoint 2013 Server- Part 1 of 2

I want to crawl a Notes database with SharePoint 2013 Search. As part of that effort, I need to install the Lotus Notes client and connector on the SharePoint 2013 Server. But there are a number of steps that I need to execute first. I follow along the steps as detailed here: http://technet.microsoft.com/en-us/library/jj591606.aspx. However, I depart from the steps and do things a bit differently based on where I ran into problems and fixed them. I document everything in detail.

In this first of two blogs, I execute the steps to:

  • install and configure the Lotus Notes client software
  • grant access privileges to the Notes \ data folder
  • install the Notes C++ API
  • create the Mappings database
  • add a user account mapping to the Mappings database

I am logged onto my SharePoint 2013 Server with the SP_Install user account. The SP_Install user account is a member of the Administrators group on this server.

Installing the Lotus Notes Client Software

I am installing the 32-bit version of Lotus Notes R8.5 on my SharePoint 2013 server. I will only install the client and not the Designer or Administrator software. I would typically recommend against ever installing such software on a server. But I don’t have access to a third party connector (e.g. BA-Insight). I have installed Lotus Notes client software more than a hundred of times already. I will touch on the key points.

I double-click on the installation file.

image

I click Yes on the User Account Control window.

image

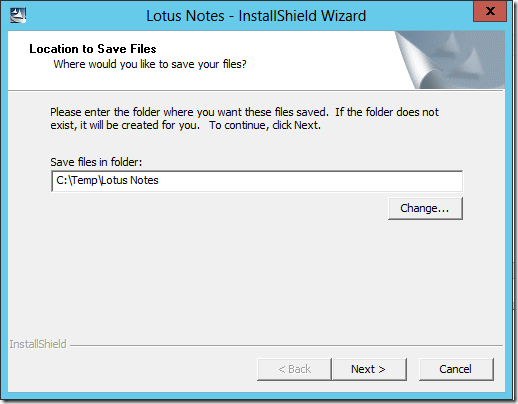
I change the file path in the InstallShield Wizard and click Next

image

The files are extracted and the installation process begins. The Install Wizard screen appears. I click Next to continue.

image

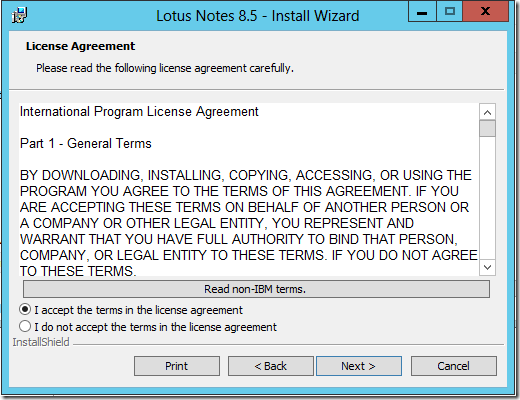
I accept the terms in the License Agreement screen and click Next to continue.

image

I enter generic text in the Customer Information screen and click Next to continue.

image

I keep the selections in the Installation Path Selection screen and click Next to continue. I actually tried it with the default file paths first and everything worked until I got to the last step of the Lotus Notes Index Setup Wizard. I could not complete the step. But simplifying the default file paths made it work.

Program Files C:\Lotus\Notes\
Data Files C:\Lotus\Notes\Data\

image

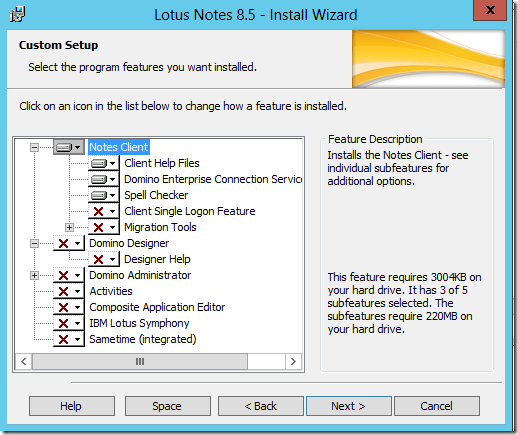
I modify the settings in the Custom Setup screen as seen below. I do not select the Domino Designer or the Sametime Client to be installed since I already have it installed on another virtual machine. I really do not want them installed on a server anyway. I click Next to continue.

image

I deselect all of the options on the Ready to Install the Program and click Install to continue.

image

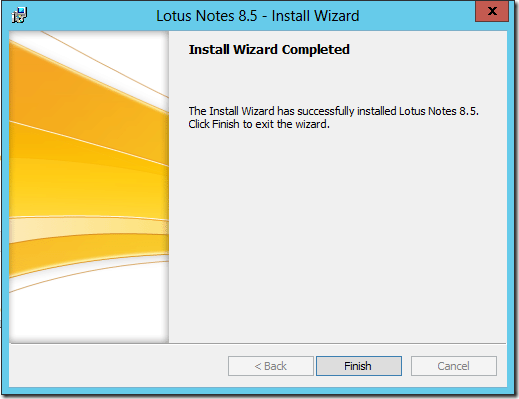
The Install Wizard continues to install until the Install Wizard Completed screen appears. I click Finish.

image

Grant Permissions on the Data Folder

I open Explorer to the Notes data folder.

image

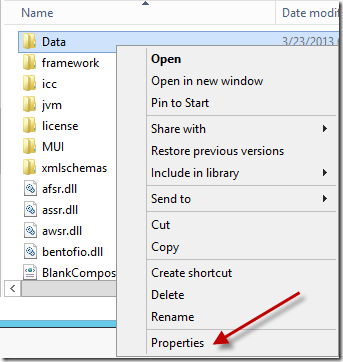
Right-click on the data folder and click on Properties.

image

Click on the Security tab on the Properties window.

image

Click on the Edit button.

image

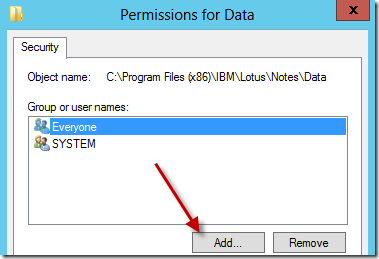
The Permissions for Data screen appears. Click on Add…

image

The Select Users screen appears. Change the location to the local server and enter WSS_WPG into the object names field and click Check Names.

image

The group name should resolve correctly. Click OK to accept and continue.

image

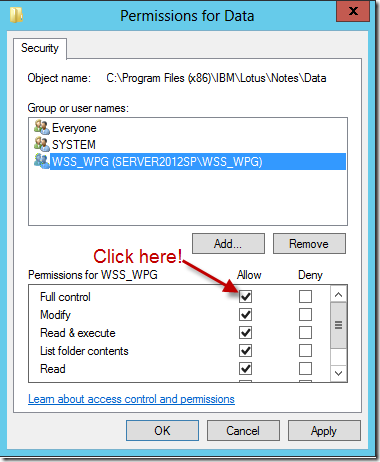
The WSS_WPG group should appear in the security list. Click the Allow checkbox on Full control under permissions. Click OK to accept the changes and continue.

image

The WSS_WPG group appears in the Security list in the Data Properties screen. Full Control permissions are granted. Click Close to close the screen.

image

Install Lotus C++ API

I downloaded the Lotus C++ API from here: https://www14.software.ibm.com/webapp/iwm/web/reg/download.do?source=ESD-SUPPORT&S_PKG=CR3DNNA&S_TACT=104CBW71&lang=en_US&cp=UTF-8

I chose the Release 3.0 for Windows file.

image

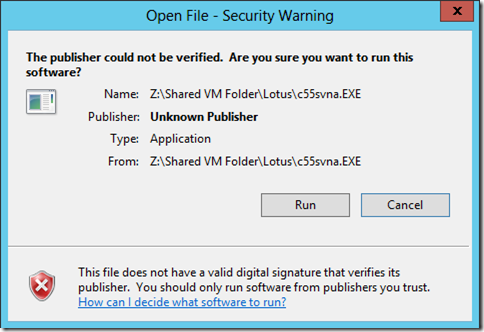
I executed the c55svna.exe file on the SharePoint 2013 server where the Lotus Notes client will be installed. I clicked on Run in the Open File – Security Warning screen.

image

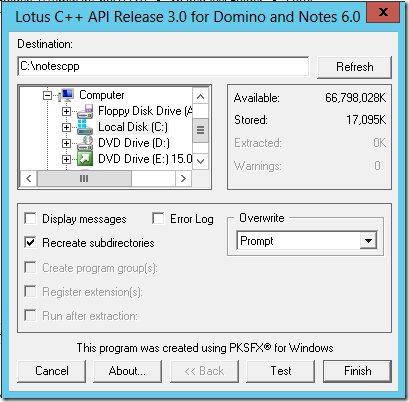
The Lotus C++ API screen appeared. I clicked Finish to continue.

image

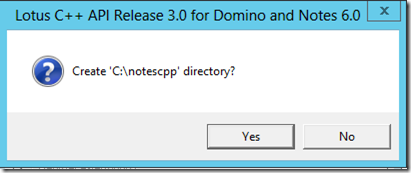
I clicked Yes on the Create directory screen.

image

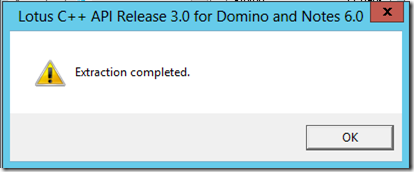
I clicked OK on the Extraction completed screen.

image

Copy the lcppn30.dll file from the C:\notescpp\lib\mswin32 folder to the C:\Program Files\Microsoft Office Servers\15.0\Bin folder.

RHR (2012-05-05): I fixed a typo below. I referenced the wrong Lotus Notes folder to copy to.

Copy the lcppn30.dll file from the C:\notescpp\lib\mswin32 folder to the C:\Lotus\Notes folder.

image

Update the Path Environmental Variable

I am not convinced that I need to update the Path Environmental Variable; but it has solved problems for me in the past when I use the Lotus C++ API from IBM.

I open Explorer and right-click on Computer. I click on the Properties option on the menu.

image

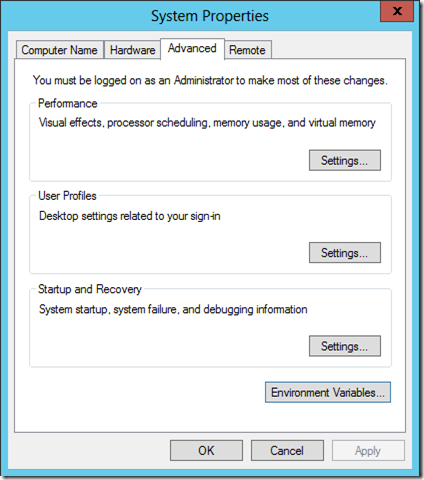
The System Properties screen appears. I click on the Advanced tab.

image

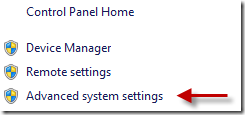
RHR (2012-05-05): The Control Panel \ System and Security \ System screen may appear. If it does, click on Advanced system settings next.

image

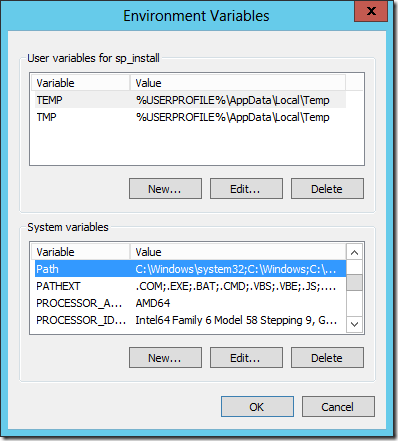
Click on Environment Variables and scroll down in the System Variables and select Path.

image

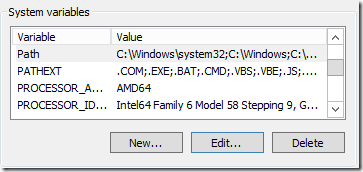
Click on Edit and the Edit System Variable screen appears. Append the following text to the end of the Variable value field. Then click OK to accept the change and continue.

;C:\Lotus\Notes;C:\notescpp\lib\mswin32

image

Click OK on the Environment Variables screen.

Click OK on the System Properties screen.

Configure the Lotus Notes Client Application

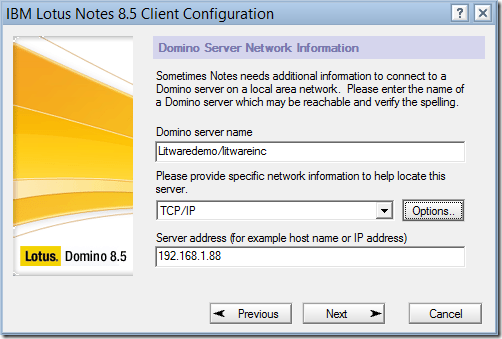
I confirm that my Domino server is running on another virtual machine. The server name is Litwaredemo/litwareinc  and the IP address is 192.168.1.88. The Lotus Notes ID that I plan to use is a member of the applicable administrators groups on the Domino server.

I click the Windows Start button on my keyboard and then click on the Lotus Notes 8.5 icon on the workspace.

image

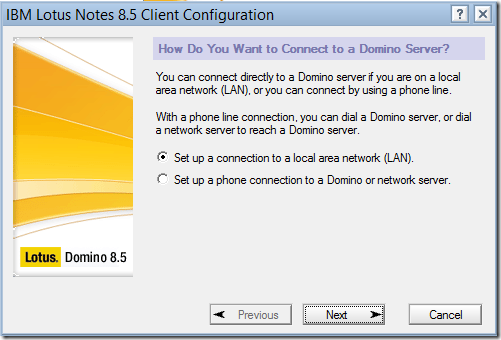
The Client Configuration screen appears and I click Next to continue.

image

The Client Configuration screen appears and I enter the details as seen below. I click Next to continue.

image

The Client Configuration screen opens. Click Next to continue.

image

The Domino Server Network Information screen appears. I enter the settings as seen below and click Next to continue.

image

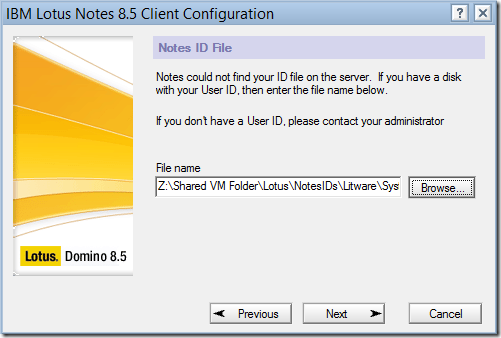
The Notes ID File screen appears. I browse to where my Notes ID is stored and click Next to continue.

image

I click Yes in the IBM Lotus Notes screen that appears. I do want my Notes ID file copied to the data directory.

image

I enter the password in the Lotus Notes password screen and click Log In to continue.

Note: Never create this Notes ID without a password! Anyone with access to the SharePoint server could then gain full access to the databases on the Domino server.

image

The Lotus Notes client successfully connects to the Domino server.

image

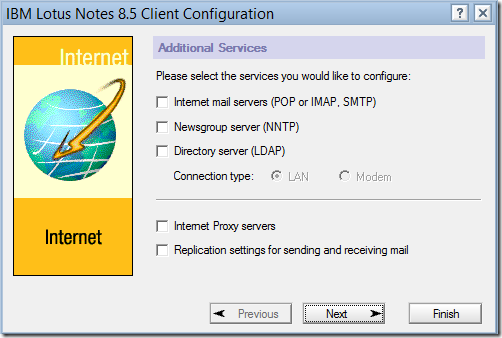
The Client Configuration screen appears. I leave the settings as is and click Next to continue.

image

Another prompt appears. I check the checkbox in the bottom of the prompt and click No to continue.

image

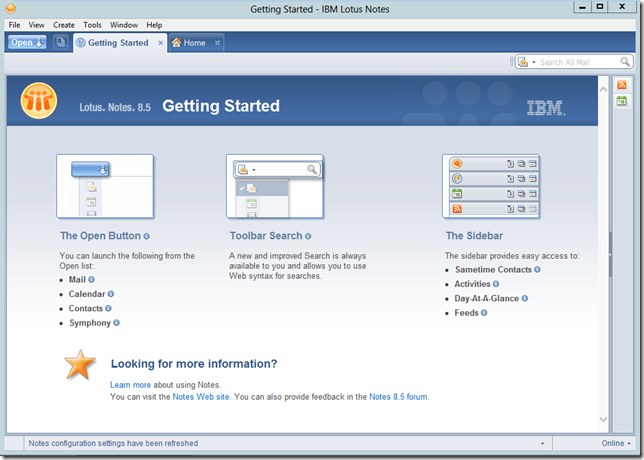
The Lotus Notes 8.5 Getting Started workspace appears.

image

I keep the Lotus Notes client running in preparation for the next steps.

Verify Access to the Lotus Domino Database that You Want to Crawl

I click on File \ Open \ Lotus Notes Application on the menu bar.

image

The Open Application screen appears. I select my Domino Server (LITWAREDEMO/litwareinc) in the drop down list and click through the folder structure until I see the database that I am looking for. I select it and click Open.

image

I wait for the Lotus Notes database to open. A Create Cross Certificate prompt appears and I click Yes to accept it.

image

The About Database document document appears in the workspace. I click the small x on the tab to close it.

image

The database opens in the workspace. It is opened to the default view named Threaded.

image

I also see a message in the view. The message indicates that the view is still being updated.

image

Eventually, the view completes updating and displays data.

image

I can test access to more Notes databases if I want to. I close the Lotus Notes client software after I completed testing. I click on the X in top right hand corner.

image

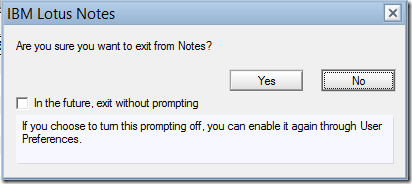
I click Yes to exit from Notes when prompted.

image

Create the Lotus Notes Mappings Database

I created the Mappings database on another virtual machine where I have the Lotus Notes Designer client installed. I opened the Lotus Notes Designer client and created a Notes database and named it “Mappings”. I then created a new form named “Mapping”. I added two fields and some labels as seen below.

image

I did change the Window Title of the form to “Mapping”.

image

I created a view named “Mappings”. The View Selection formula is: SELECT Form="Mapping". I add a column for each field. I sort the first column in ascending order. The view design appears as below:

image

I removed the default view that came with the design. Only the Mappings view appears in the view design list now.

image

Add User Accounts to the Mappings Database

I open the Mappings database in the Lotus Notes client and click on Create \ Mapping.

image

A blank Notes document appears as below:

image

I enter the names as below to create a new mapping.

image

Lotus Notes User ID: LitwareInc\System Administrator
Windows User:

contoso\Admin

I click on the save icon image and then close the document by clicking on File \ Close.

image

The new document appears in the Mappings view.

image

I close the Notes client on my virtual machine. I copy the Mappings database file from my Notes \ data folder to a shared folder. I then copy the file from the shared folder to the lotus \ Domino \ data folder on the Domino server. Not to the Notes client on the SharePoint server!

Restart the Server

I have the Search components installed on my SharePoint 2013 server. I have to restart the server before proceeding with the next steps.

This concludes part 1 of 2 of my blog entries on installing and configuring the Lotus Notes Connector for SharePoint 2013. I hope that you found it helpful. Part 2 will provide the steps to complete everything to the point where you can get search results from your Notes databases. You can read my other blog entries on how I installed and configured my SharePoint 2013 server environment.

Installing and Configuring the Lotus Notes Connector for SharePoint 2013 Server: Part 1 of 2

Installing and Configuring the Lotus Notes Connector for SharePoint 2013 Server: Part 2 of 2

Installing and Configuring SharePoint 2013: Part 4 of 4

This blog entry provides the details on installing and configuring SharePoint 2013 on a Windows 2012 server. I include some PowerShell scripts for setting up a few services and a content database. I also show how to configure and run the crawler service for the first time.

This is a copy of the blog post that I originally posted here:

Installing and Configuring SharePoint 2013: Part 4 of 4

As a reminder, I am separating the details into four blog posts:

Installing and Configuring a Three-Server SharePoint 2013 Environment: Part 1 of 4
Installing and Configuring the Windows Domain Controller: Part 2 of 4
Installing and Configuring SQL Server 2012: Part 3 of 4

Installing and Configuring SharePoint 2013: Part 4 of 4

RHR (2012/04/25): I made several corrections to this entry after I ran into multiple problems during a second attempt at installation and configuration.

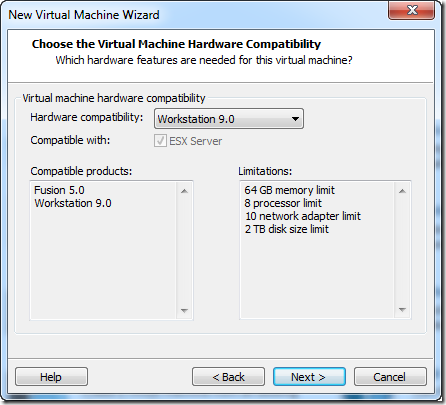
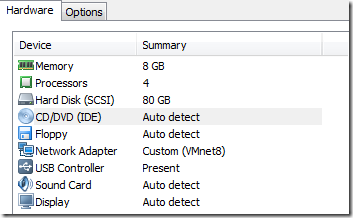
I setup another VMWare virtual machine for the SharePoint 2013 server. I plan to configure it as below.

SharePoint 2013 Server

  • Windows Server 2012
  • SharePoint Server 2013
  • Memory: 8GB RAM <— I am tempted to increase this to at least 12GB when running search!
  • CPU: 4
  • Drive: 1x80GB
  • IP Address: 192.168.67.13
  • Domain: contoso.com
  • Name: server2012sp
  • Target Drive: 2

Make sure that you select VMnet8 (NAT) for the Custom: Specific virtual network in Network connection in the Virtual Machine Settings.

Make sure that you select “2012 Standard” and not “2012 Datacenter”.

image image

Also, change the server name (server2012sp), domain (Contoso), and IP address (192.168.67.13) after installing the operating system.

Note: I had a problem once with the server connecting to the domain controller. So I added the following entries to the hosts file in the C:\Windows\System32\Drivers\etc directory.

I first had to give the Admin user account Full control access to the hosts file.

192.168.67.11 server2012dc
192.168.67.12 server2012sql

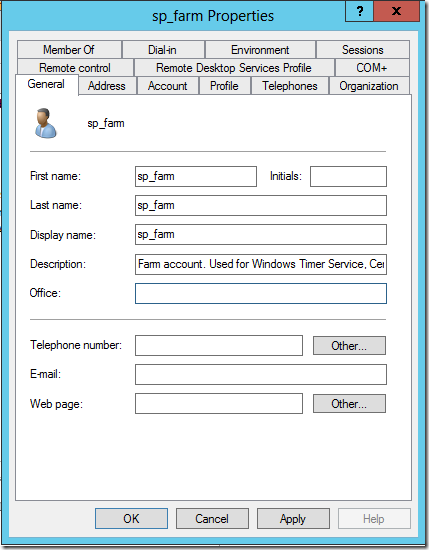
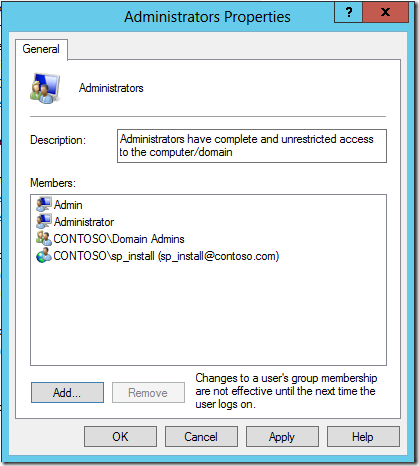
I install the Windows 2012 operating system just as with the other two servers. I add the sp_install and sp_farm user accounts to the Administrators group on this server.

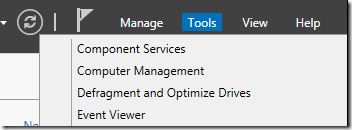
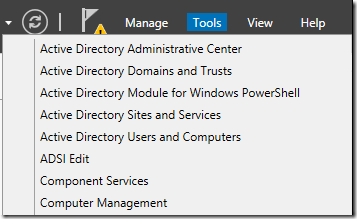
I click on Tools \ Computer Management.

image

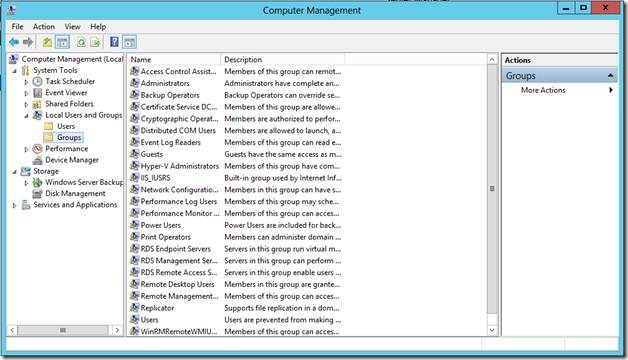
The Computer Management windows opens. I click on Local Users and Groups.
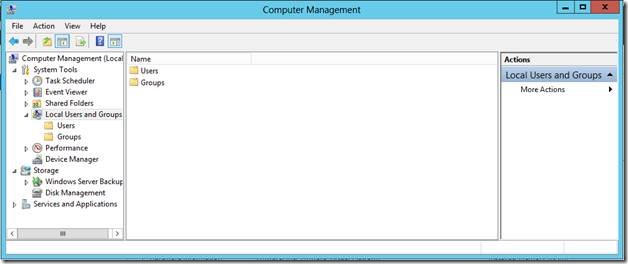
clip_image003

I double-click on Groups and the list of group accounts is displayed.

clip_image005

I double-click on the Administrators entry and the Administrators Properties screen opens.
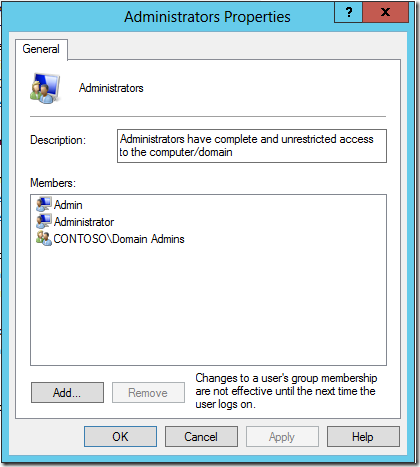
clip_image006

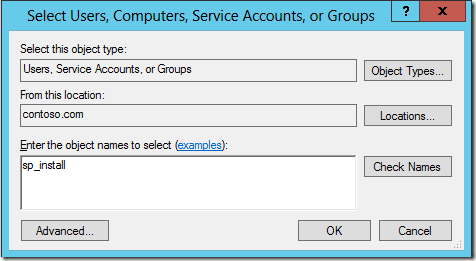
I click on Add… and the Select Users, Computers, Service Accounts, or Groups screen displays. I enter the sp_install user account name and click Check Names.
clip_image007

The Windows Security screen appears. I enter the Administrator credentials and click OK to continue.

clip_image008

The Select Users … screen returns. I click OK to continue.

clip_image009

The Administrators Properties screen is updated. I click OK to close the screen.
clip_image010

IMPORTANT! Repeat the process for the contoso\sp_farm user account!

I close the Computer Management screen.

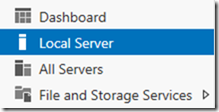
I want to logon as the sp_install user. I click on Local Server.

clip_image011

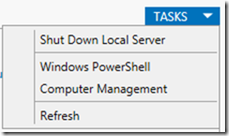
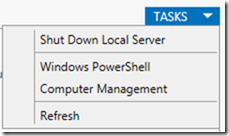
I click on Tasks and select Shut Down Local Server.
clip_image012

I select Switch User on the What do you want the computer to do? drop down list and click OK to continue.

clip_image013

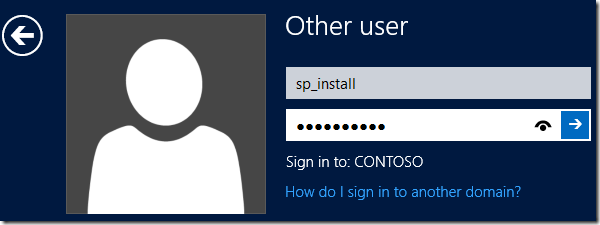
The server restarts. I click Other user.

clip_image014

I enter the credentials for sp_install and click the arrow.
clip_image015

I am now logged in with the sp_install user account and have Administrator rights. I also have the appropriate rights on the SQL Server with this account.

Install Prerequisites

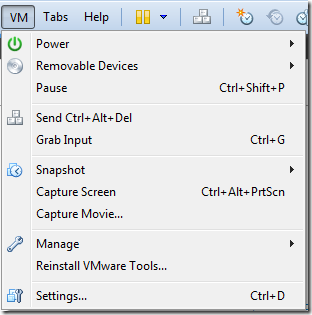
I click on VM \ Settings on the VMWare toolbar.
clip_image016

The Virtual Machine Settings screen appears.
clip_image017

I click on Add… and the Add Hardware Wizard screen appears. I click on CD\DVD Drive and click Next.

clip_image018

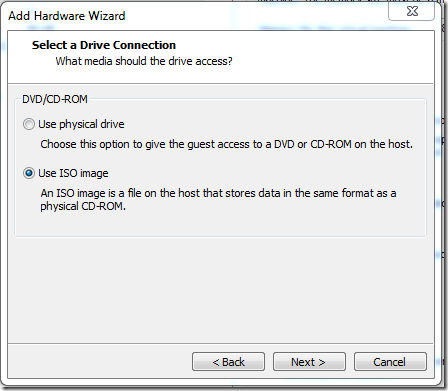
I select Use ISO image and click Next.
clip_image019

I browse to the ISO image (en_sharepoint_server_2013_x64_dvd_1121447.iso) that I have for SharePoint Server 2013. I click Finish to continue.

clip_image020

I click OK to close the Virtual Machine Settings screen. A message appears in the top right corner of the screen.

clip_image021

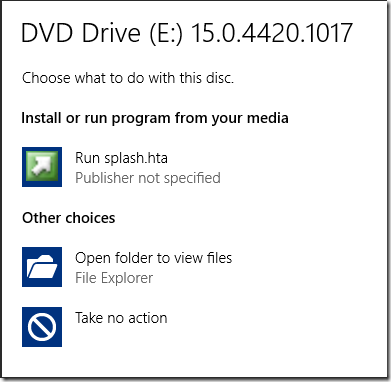
I tap on the message and another message appears.
clip_image022

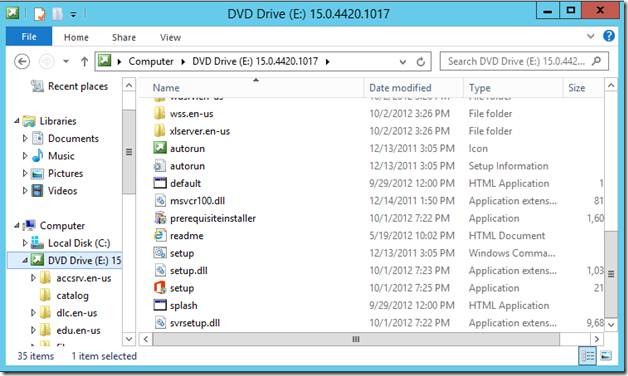
I click on Open folder to view files. The Explorer window opens.
clip_image024

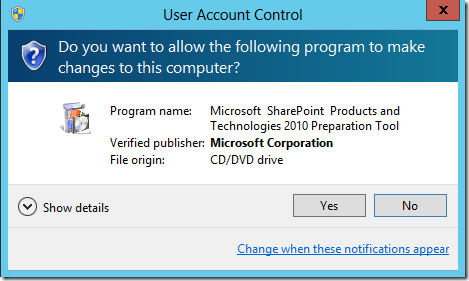
I scroll down and find prerequisiteinstaller and double-click on it. I click Yes on the User Account Control screen.
clip_image025

The Microsoft SharePoint 2013 Products Preparation Tool screen appears. I click Next to continue.

clip_image027

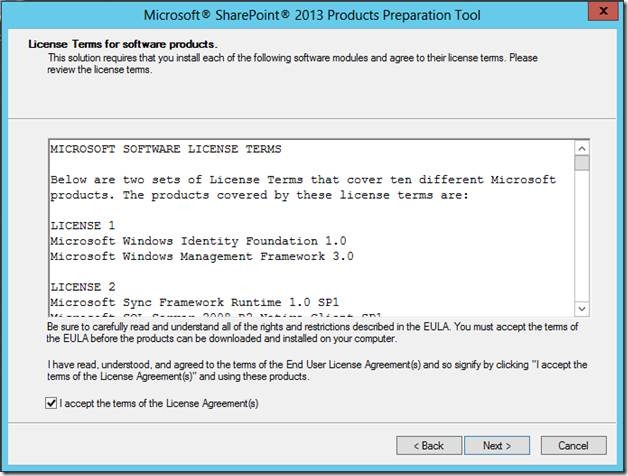
The License Terms for software products screen appears. I click on the I accept terms … and click Next.
clip_image029

The installation begins.

clip_image031

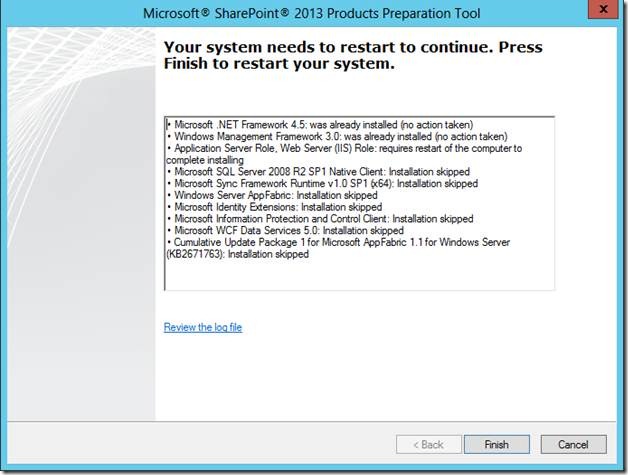
A restart message appears in the screen when the process completes. I click Finish to continue.

Note: I did have a major problem at this stage once. I had no connection to the DNS server from this server. I disabled the network adapter, added a new network adapter in VM Tools, and configured it. I then deleted the old network adapter in VM Tools. The new network adapter had the same configuration as the old one. It connected to the DNS server and displayed an Internet connection.
clip_image033

Windows Server restarts.

clip_image034

Windows is configuring features.

clip_image035

I login to the server

clip_image036

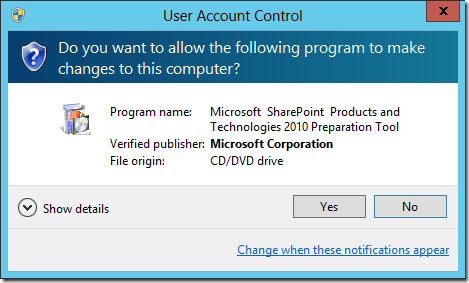
A User Account Control screen is displayed. I click Yes to continue.
clip_image037

The Microsoft SharePoint 2013 Products Preparation Tool screen is displayed.

clip_image038

I wait for the prerequisites to be installed. Another restart message is displayed. I note that all tasks are completed successfully. I click Finish to continue.

clip_image039

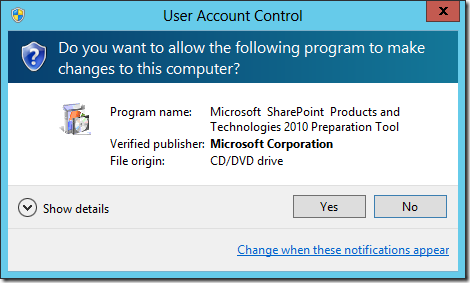
Another restart and login. A User Account Control screen is displayed. I click Yes to continue.
clip_image040

The Microsoft SharePoint 2013 Products Preparation Tool screen is displayed.

clip_image041

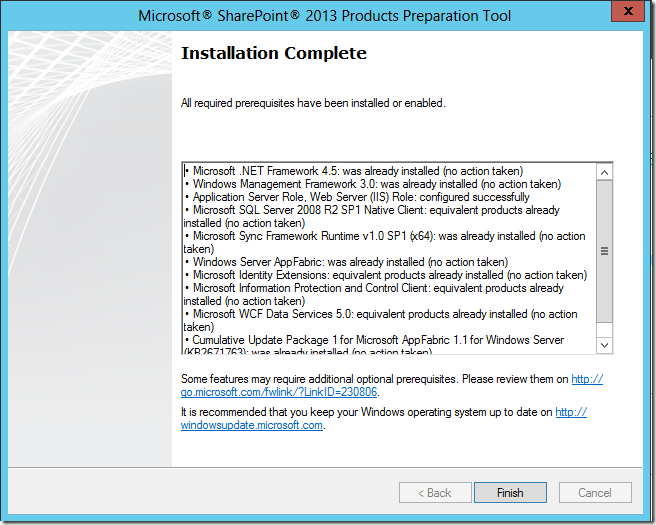
The process runs quickly and is soon replaced by the Installation Complete screen. I click Finish to continue.

I see that I have two additional roles displayed in the Dashboard: App Server and IIS.

clip_image043

clip_image044

Install SharePoint 2013

I click on the explorer icon on the task bar, expand Computer \ DVD Drive (E:) and find the setup file.

clip_image046

I double-click on the setup file to start the installation process. A SharePoint 2013 screen is displayed.

clip_image047

It is soon replaced with a larger screen that includes a menu.

clip_image048

I click on Install SharePoint Server and a User Account Control screen is displayed. I click Yes to continue.

clip_image049

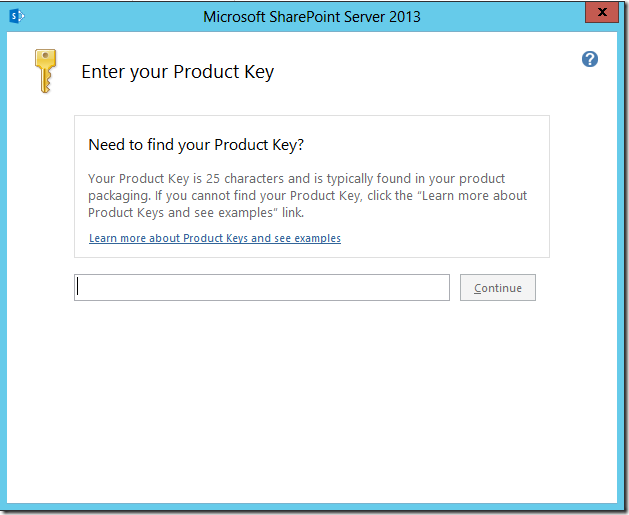
The Enter your Product Key screen is displayed. I enter the product key and click Continue.
clip_image050

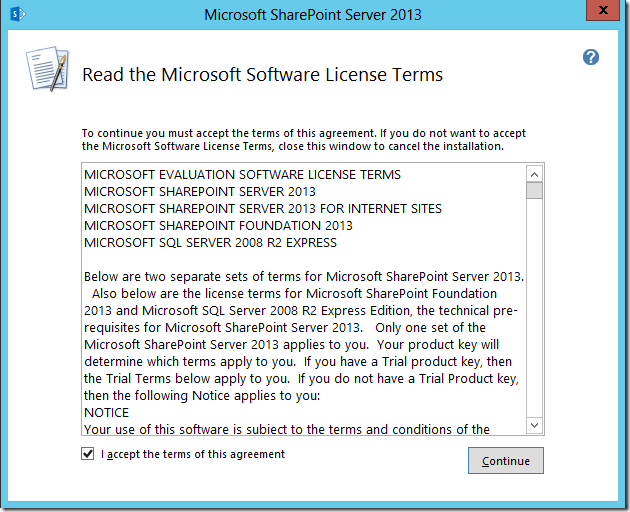
The Read the Microsoft Software License Terms screen is displayed. I click on I accept the terms of this agreement and click Continue to continue.
clip_image051

The Server Type screen appears. I keep Complete selected and click Install Now.

clip_image052

The Installation Progress screen appears.

clip_image053

Installation nears completion.

clip_image054

Installation completes. The Run Configuration Wizard screen appears. I uncheck the Run the SharePoint Products Configuration Wizard and click Close.

clip_image055

I click Exit on the SharePoint 2013 screen to close it.

Creating Content Databases without GUIDs in the Name

Click on the Windows button on your keyboard.

Right-click on the SharePoint 2013 Management Shell on the Start workspace

clip_image056

Click on Run as administrator.

Note: I read about the Run as administrator requirement here: http://tomresing.com/blog/Lists/Posts/Post.aspx?ID=57

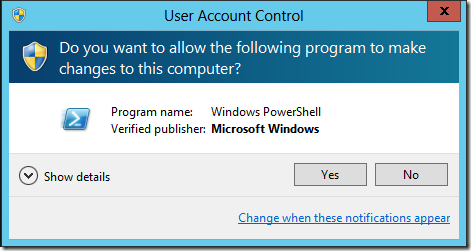
Click on Yes in the User Account Control window.
clip_image057

The SharePoint Management Shell window opens in the workspace.

image

——————————————————————————————————-

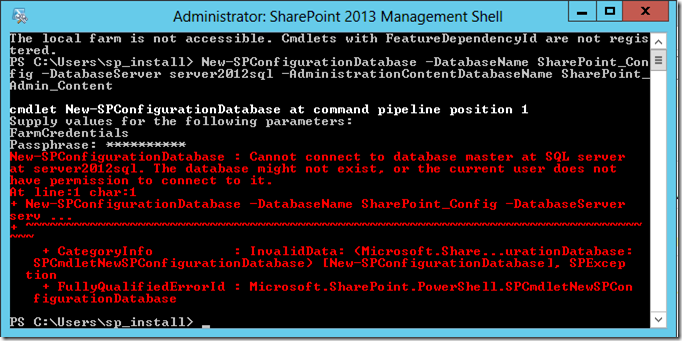
Note: I did run into an error on this step once. The Powershell script could not connect to the SQL server.
image

I tried pinging the server2012sql SQL server from a command prompt without success. So I added the following entries to the hosts file in the C:\Windows\System32\Drivers\etc directory..

192.168.67.11    server2012dc
192.168.67.12    server2012sql

I had to give Full Control permission to the sp_install user account to the hosts file before I was able to edit and save changes.

Pinging will not work because of the firewall; but at least the IP address was available. So I tried running the script again. This time it worked!

I also changed the hosts file at the beginning of this blog entry for a different reason.

——————————————————————————————————-

Copy and paste the following text into the SharePoint Management Shell window. Check that the spaces appear correctly!

I sometimes paste it into Notepad on the VM first.

New-SPConfigurationDatabase –DatabaseName SharePoint_Config -DatabaseServer server2012sql –AdministrationContentDatabaseName SharePoint_Admin_Content

clip_image061

Press the Enter key on the keyboard. The Shell screen refreshed and requests credentials.

clip_image063

A Credentials screen appears. I enter the sp_farm credentials. I click OK to continue.

clip_image064

I’m still being asked to supply a passphrase for FarmCredentials. I enter the credentials passphrase and hit Enter on the keyboard.

clip_image066

I wait for something to happen … but I am impatient. I go to the server2012sql server and run the Microsoft SQL Server Management Studio.

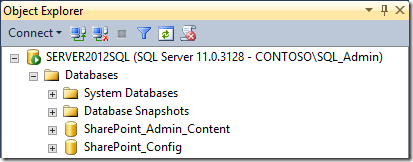
I expand the Object Explorer to see the Databases. I see that the databases are created!
clip_image067

I return to the server2012sp server and see that the prompt has returned in the Shell window.

clip_image069

The process has completed successfully! I close the Shell window.

Run Configuration Wizard

I click on the Windows key on the keyboard and then click on the SharePoint 2013 Products Configuration Wizard icon on the Start screen.
clip_image070

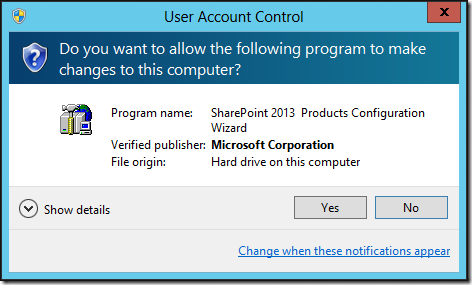
The User Account Control window appears. I click Yes to continue.
clip_image071

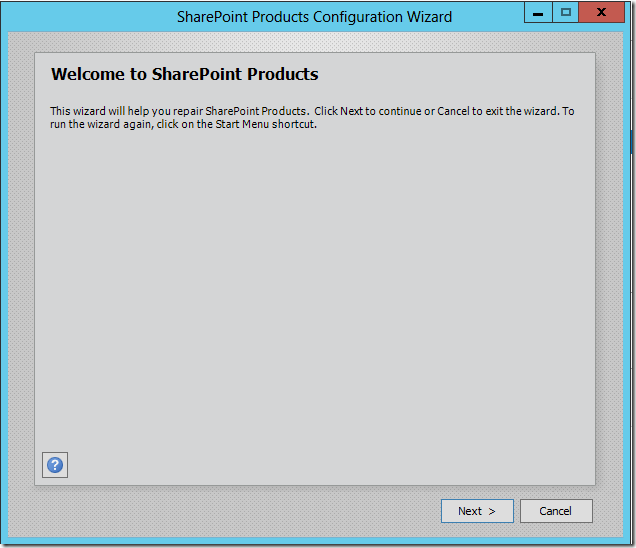
The SharePoint Products Configuration Wizard screen appears. I click Next to continue.
clip_image072

A prompt appears warning me about services being started or reset. I click Yes to continue.

clip_image073

The Modify server farm Settings screen appears. I review and accept the settings. I click Next to continue.

clip_image074

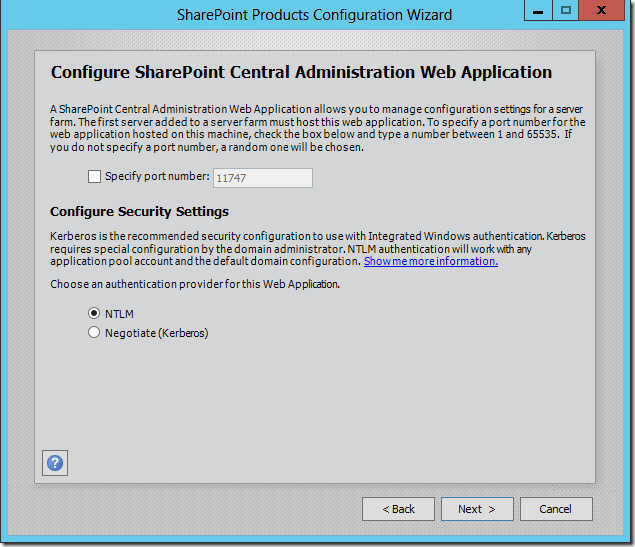
The Configure SharePoint Central Administration Web Application screen opens. I review and accept the settings. I record the port number 11747. I click Next to continue.
clip_image076

The Completing the SharePoint Products Configuration Wizard screen opens. I review and accept the settings. I click Next to continue.

clip_image077

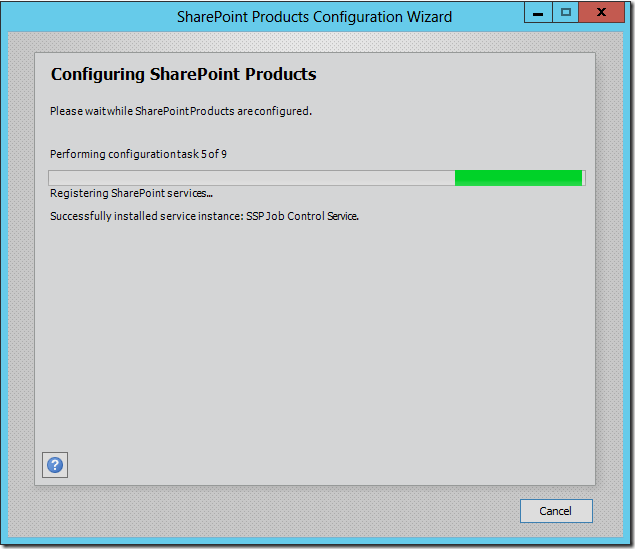
The SharePoint product is configuring …
clip_image078

The Configuration Successful screen is displayed. I click Finish to close the screen.

clip_image079

Welcome Wizard

The Central Administration page begins to load. A Windows Security prompt appears. I login with the sp_install credentials. I leave Remember my credentials unchecked and click OK.

clip_image080

The web page continues to load. The Help Make SharePoint Better screen appears. I click No and OK to continue.

clip_image082

The Welcome page is displayed. I click Cancel. I can always restart the Welcome Wizard from the Central Administration screen later.

The Central Administration webpage is displayed.

clip_image084

Creating Service Apps with PowerShell Scripts

I am going to run some PowerShell scripts to create the State Service Application and the Usage and Health Data Collection application. These came from a presentation that Todd Klindt made at the SharePoint Technical Conference in San Francisco.

Click on the Windows button on your keyboard.

Right-click on the SharePoint 2013 Management Shell on the Start workspace

clip_image056[1]

Click on Run as administrator.

Click on Yes in the User Account Control window.

clip_image057[1]

The SharePoint Management Shell window opens in the workspace.

clip_image059[1]

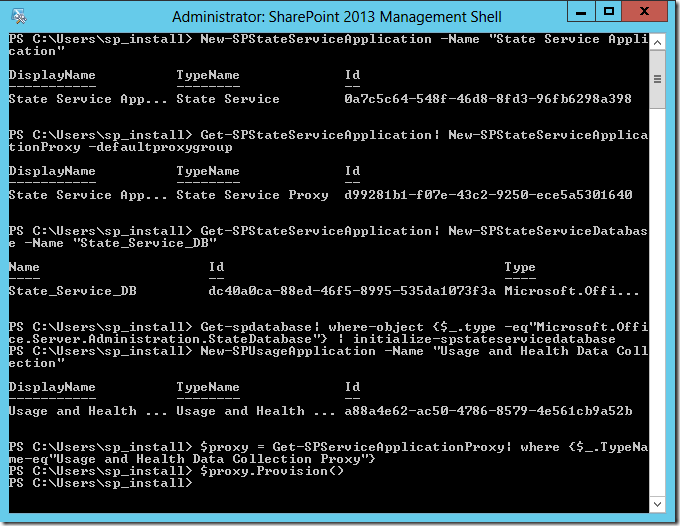
Copy and paste the following text into the SharePoint 2013 Management Shell window. Make sure to remove any empty lines.

New-SPStateServiceApplication -Name “State Service Application”

Get-SPStateServiceApplication| New-SPStateServiceApplicationProxy -defaultproxygroup

Get-SPStateServiceApplication| New-SPStateServiceDatabase -Name “State_Service_DB”

Get-spdatabase| where-object {$_.type -eq”Microsoft.Office.Server.Administration.StateDatabase”} | initialize-spstateservicedatabase

New-SPUsageApplication -Name “Usage and Health Data Collection”

$proxy = Get-SPServiceApplicationProxy| where {$_.TypeName-eq”Usage and Health Data Collection Proxy”}

$proxy.Provision()

You may have to click Enter on the keyboard to get the last command to run, too. It runs successfully as seen below.
image

You can validate that the applications are created by opening the Central Administration web page and clicking on Manage service applications in the Application Management section. You should see the new service applications listed by name.

clip_image086

The accounts that I use for the Search service (SP_Search), the Search Admin Web Service application pool (SP_Crawl), and the Search Query and Site Settings Web Service application pool (SP_Search) must be registered as managed accounts in SharePoint Server 2013 so that they are available when I create the Search service application. I used the procedure defined at this site (http://technet.microsoft.com/en-us/library/gg502597.aspx) to register each of these accounts as a managed account.

I see the Managed Accounts screen displayed as below when completed.

image

Next, I will create the Search Service Application and topology.

RHR (2012/04/25): I tried running a PowerShell script to do so that I downloaded the PowerShell script from http://melcher.it/2012/07/sharepoint-2013-create-a-search-service-application-and-topology-with-powershell/.

I modified the applicable parameters. It worked once for me; but I have since received errors every time that I run it.

I read a blog posting here that suggested installing Windows Updates. So I did so. But it still failed to run. So I decided to install using Central Administration.

I click on New \ Search Service Application in Manage Service Applications.

image

The Create New Search Service Application screen appears. I update the Service Application name and validate that the contoso\sp_crawl user account is selected.

image

I scroll down and select Create new application pool and enter the Application pool name as seen below.

image

I select Configurable for the security account and select contoso\sp_crawl. I then click on use existing application pool and select the Search App Pool.

image

I select Configurable for the security account for the application pool and select contoso\sp_crawl.

image

I click OK to continue. The Create New Search Service Application screen appears.

image

Upon completion, a message appears stating “created successfully.

image

I validate a few items to ensure the actions completed successfully.

I open the Microsoft SQL Server Management Studio application on server2012sql and expand the Object Explorer to see the Databases.

I see four Search databases created. Sadly, they do not have the nice, clean names like I would be able to create if the PowerShell scripts worked.

image

I open Central Administration on the server2012sp server and click on Application Management. I then click on Manage Service Applications. I can see the Search Administration Web Service for Search SA and the Search SA service applications.

image

I open Central Administration on the server2012sp server and click on General Application Settings. I then click on Farm Search Administration.

clip_image094

I can see that the Search Service App service application is created.

image

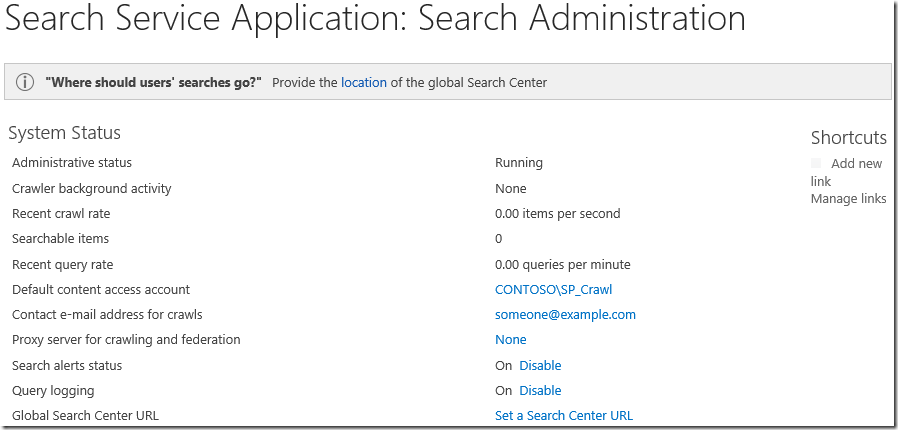
I click on Search Service App to review the Administrative status. I see that it is not able to connect.
image

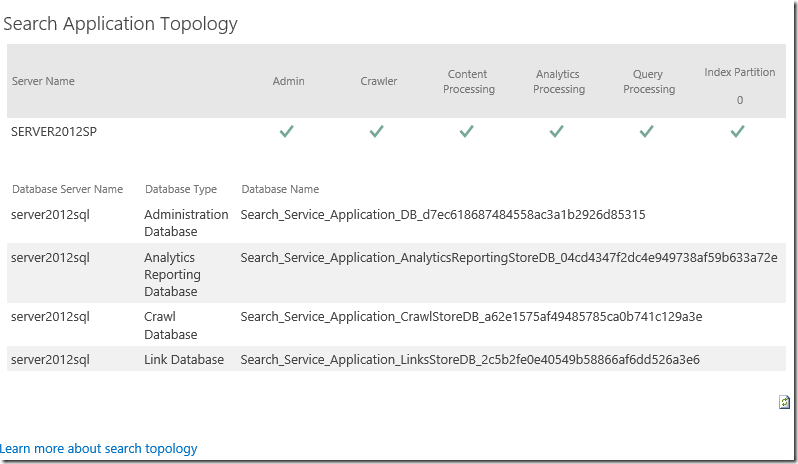
I scroll down and review the Search Application Topology and the list of databases. These match what I saw listed on the SQL Server.
image

I click on Central Administration \ Manage services on server.

image

I scroll down to see that all of the Search services are started.

image

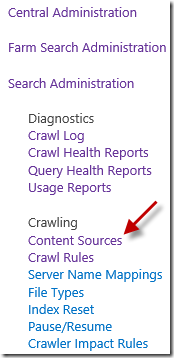
Next I want configure crawling. I click on Content Sources on the left navigation.
clip_image103

The Search SA: Manage Content Sources screen appears.

image

I click on Local SharePoint sites and click on Edit in the drop down list.

image

The Edit Content Source screen appears. I enter http://server2012sp in the Type start addresses below field.

clip_image109

I click Create Schedule under Incremental Crawl.

clip_image110

I configure the schedule in the Manage Schedules screen as seen below. I click OK to continue.

clip_image112

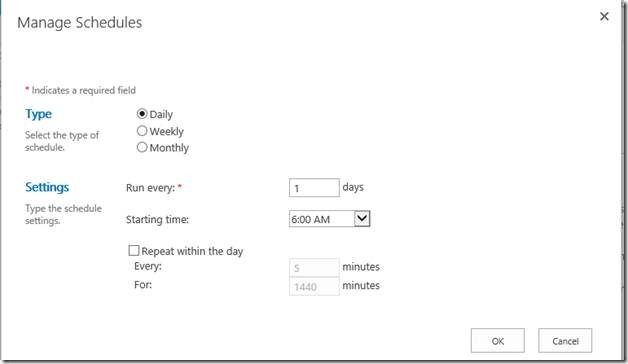
I click Create Schedule under Full Crawl. I configure the schedule in the Manage Schedules screen as seen below. I click OK to continue.
clip_image114

The Crawl Schedules appear as seen below. I click OK to close the Edit Content Source screen.

clip_image116

I click on Local SharePoint sites and Start Full Crawl on the drop down list.

image

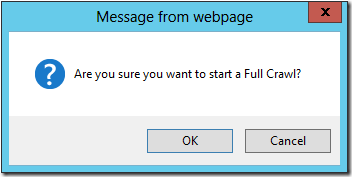
A Message from webpage appears. I click OK to accept and continue.
clip_image119

The crawling starts.

clip_image120

I refresh the screen by clicking on Refresh and see that the crawling process is still crawling. I can also see when the next full crawl is scheduled to run. I also have options to stop or pause all crawls.

clip_image122

I refresh the screen by clicking on Refresh and see that the crawling process is completing.

clip_image124

I refresh the screen by clicking on Refresh and see that the crawling process is idle.

clip_image126

I click on Crawl Log on the left side navigation and I can see the last crawl log entry. Note that there is a 1 under Successes. I conclude that my first full crawl was completed successfully.

image

Creating New Web Application with PowerShell Script

I am going to run a PowerShell script to create a new web application. The script came from the following site: http://blogs.msdn.com/b/rcormier/archive/2012/09/01/how-to-create-sharepoint-web-applications-with-powershell.aspx.

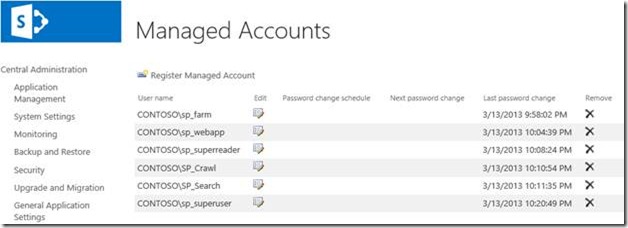
The accounts (contoso\sp_webapp, contoso\sp_superreader, and contoso\sp_superuser) that I use for the web application must be registered as managed accounts in SharePoint Server 2013 so that they are available when I create the application. I used the procedure defined at this site (http://technet.microsoft.com/en-us/library/gg502597.aspx) to register each of these accounts as a managed account.

I see the Managed Accounts screen displayed as below when completed.
clip_image130

Run the SharePoint 2013 Management Shell as administrator.

Copy and paste the following text into a Notepad file on the server2012sp server. I modified the Script Variables for my SharePoint configuration.

Or you can download a Word document containing the script and store it in a ps1 file. CreateWebApplication

   1:  $ver = $host | select version if ($ver.Version.Major -gt 1) {$Host.Runspace.ThreadOptions = "ReuseThread"} 
   2:  Add-PsSnapin Microsoft.SharePoint.PowerShell -ErrorAction SilentlyContinue
   3:  Import-Module WebAdministration -ErrorAction SilentlyContinue
   4:  ##
   5:  #This Script Creates SharePoint Web Applications
   6:  ##
   7:  ##
   8:  #Load Script Variables
   9:  ##
  10:  Write-Progress -Activity "Creating Web Application" -Status "Creating Script Variables"
  11:  #This is the Web Application URL
  12:  $WebApplicationURL = "http://server2012sp"
  13:  #This is the Display Name for the SharePoint Web Application
  14:  $WebApplicationName = "Contoso Web Application"
  15:  #This is the Content Database for the Web Application
  16:  $ContentDatabase = "Contoso_ContentDB"
  17:  #This is the Display Name for the Application Pool
  18:  $ApplicationPoolDisplayName = "Contoso App Pool"
  19:  #This is identity of the Application Pool which will be used (Domain\User)
  20:  $ApplicationPoolIdentity = "contoso\sp_webapp"
  21:  #This is the password of the Application Pool account which will be used
  22:  $ApplicationPoolPassword = "pass@word1"
  23:  #This is the Account which will be used for the Portal Super Reader Account
  24:  $PortalSuperReader = "contoso\sp_superreader"
  25:  #This is the Account which will be used for the Portal Super User Account
  26:  $PortalSuperUser = "contoso\sp_superuser"
  27:  ##
  28:  #Begin Script
  29:  ##
  30:  $AppPoolStatus = $False
  31:  Write-Progress -Activity "Creating Web Application" -Status "Checking if Web Application Already Exists"
  32:  if(get-spwebapplication $WebApplicationURL -ErrorAction SilentlyContinue)
  33:  {
  34:  #If a web application with the specifid URL already exists, exit
  35:  Write-Progress -Activity "Aborting Web Application Creation" -Status "Web Application with URL $WebApplication Already Exists"
  36:  Write-Host "Aborting: Web Application $WebApplicationURL Already Exists" -ForegroundColor Red
  37:  sleep 5
  38:  }
  39:  else
  40:  {
  41:  Write-Progress -Activity "Creating Web Application" -Status "Checking if Application Pool Already Exists"
  42:  #Check to see if the specified application pool alrady exists. If it exists, use the existing app pool
  43:  if($AppPool = Get-SPServiceApplicationPool $ApplicationPoolDisplayName -ErrorAction SilentlyContinue)
  44:  {
  45:  Write-Progress -Activity "Creating Web Application" -Status "Re-Using Existing SharePoint Application Pool"
  46:  Set-Variable -Name AppPoolStatus -Value "IsSharePoint" -scope "script"
  47:  }
  48:  else
  49:  {
  50:  if((Test-Path IIS:\AppPools\$ApplicationPoolDisplayName).tostring() -eq "True")
  51:  {
  52:  Write-Progress -Activity "Creating Web Application" -Status "Application Pool with name $ApplicationPoolDisplayName exists and is not used by SharePoint"
  53:  Set-Variable -Name AppPoolStatus -Value "IsNotSharePoint" -scope "script"
  54:  }
  55:  }
  56:  if($AppPoolStatus -eq "IsNotSharePoint")
  57:  {
  58:  Write-Host "Aborting: Application Pool $ApplicationPoolDisplayName already exists on the server and is not a SharePoint Application Pool" -ForegroundColor Red
  59:  Write-Progress -Activity "Creating Web Application" -Status "Aborting: SharePoint Cannot use the specified Application Pool"
  60:  }
  61:  elseif($AppPoolStatus -eq "IsSharePoint")
  62:  {
  63:  #Check to see if the URL starts with HTTP or HTTPS. This can be used to determine the appropriate host header to assign
  64:  if($WebApplicationURL.StartsWith("http://"))
  65:  {
  66:  $HostHeader = $WebApplicationURL.Substring(7)
  67:  $HTTPPort = "80"
  68:  }
  69:  elseif($WebApplicationURL.StartsWith("https://"))
  70:  {
  71:  $HostHeader = $WebApplicationURL.Substring(8)
  72:  $HTTPPort = "443"
  73:  }
  74:  Write-Progress -Activity "Creating Web Application" -Status "Application Pool $ApplicationPoolDisplayName Already Exists, Using Existing Application Pool"
  75:  #Grab the existing application pool, assign it to the AppPool variable
  76:  Set-Variable -Name AppPool -Value (Get-SPServiceApplicationPool $ApplicationPoolDisplayName) -scope "script"
  77:  Write-Progress -Activity "Creating Web Application" -Status "Creating Web Application $WebapplicationURL"
  78:  #Create a new web application using the existing parameters, assign it to the WebApp variable such that object cache user accounts can be configured
  79:  $WebApp = New-SPWebApplication -ApplicationPool $ApplicationPoolDisplayName -Name $WebApplicationName -url $WebApplicationURL -port $HTTPPort -DatabaseName $ContentDatabase -HostHeader $hostHeader
  80:  Write-Progress -Activity "Creating Web Application" -Status "Configuring Object Cache Accounts"
  81:  #Assign Object Cache Accounts
  82:  $WebApp.Properties["portalsuperuseraccount"] = $PortalSuperUser
  83:  $WebApp.Properties["portalsuperreaderaccount"] = $PortalSuperReader
  84:  Write-Progress -Activity "Creating Web Application" -Status "Creating Object Cache User Policies for Web Application"
  85:  #Create a New Policy for the Super User
  86:  $SuperUserPolicy = $WebApp.Policies.Add($PortalSuperUser, "Portal Super User Account")
  87:  #Assign Full Control To the Super User
  88:  $SuperUserPolicy.PolicyRoleBindings.Add($WebApp.PolicyRoles.GetSpecialRole([Microsoft.SharePoint.Administration.SPPolicyRoleType]::FullControl))
  89:  #Create a New Policy for the Super Reader
  90:  $SuperReaderPolicy = $WebApp.Policies.Add($PortalSuperReader, "Portal Super Reader Account")
  91:  #Assign Full Read to the Super Reader
  92:  $SuperReaderPolicy.PolicyRoleBindings.Add($WebApp.PolicyRoles.GetSpecialRole([Microsoft.SharePoint.Administration.SPPolicyRoleType]::FullRead))
  93:  Write-Progress -Activity "Creating Web Application" -Status "Updating Web Application Properties"
  94:  #Commit changes to the web application
  95:  $WebApp.update()
  96:  }
  97:  else
  98:  {
  99:  Write-Progress -Activity "Creating Web Application" -Status "Creating Application Pool"
 100:  #Since we have to create a new application pool, check to see if the account specified is already a managed account
 101:  if(get-spmanagedaccount $ApplicationPoolIdentity)
 102:  {
 103:  #If the specified account is already a managed account, use that account when creating a new application pool
 104:  Set-Variable -Name AppPoolManagedAccount -Value (Get-SPManagedAccount $ApplicationPoolIdentity | select username) -scope "Script"
 105:  Set-Variable -Name AppPool -Value (New-SPServiceApplicationPool -Name $ApplicationPoolDisplayName -Account $ApplicationPoolIdentity) -scope "Script"
 106:  }
 107:  else
 108:  {
 109:  #If the specified account is not already a managd account create a managed account using the credentials provided
 110:  $AppPoolCredentials = New-Object System.Management.Automation.PSCredential $ApplicationPoolIdentity, (ConvertTo-SecureString $ApplicationPoolPassword -AsPlainText -Force)
 111:  Set-Variable -Name AppPoolManagedAccount -Value (New-SPManagedAccount -Credential $AppPoolCredentials) -scope "Script"
 112:  #Create an application pool using the new managed account
 113:  Set-Variable -Name AppPool -Value (New-SPServiceApplicationPool -Name $ApplicationPoolDisplayName -Account (get-spmanagedaccount $ApplicationPoolIdentity)) -scope "Script"
 114:  }
 115:  #Check to see if the URL starts with HTTP or HTTPS. This can be used to determine the appropriate host header to assign
 116:  if($WebApplicationURL.StartsWith("http://"))
 117:  {
 118:  $HostHeader = $WebApplicationURL.Substring(7)
 119:  $HTTPPort = "80"
 120:  }
 121:  elseif($WebApplicationURL.StartsWith("https://"))
 122:  {
 123:  $HostHeader = $WebApplicationURL.Substring(8)
 124:  $HTTPPort = "443"
 125:  }
 126:  Write-Progress -Activity "Creating Web Application" -Status "Creating Web Application $WebapplicationURL"
 127:  #Create a new web application using the existing parameters, assign it to the WebApp variable such that object cache user accounts can be configured
 128:  $WebApp = New-SPWebApplication -ApplicationPool $AppPool.Name -ApplicationPoolAccount $AppPoolManagedAccount.Username -Name $WebApplicationName -url $WebApplicationURL -port $HTTPPort -DatabaseName $ContentDatabase -HostHeader $hostHeader
 129:  Write-Progress -Activity "Creating Web Application" -Status "Configuring Object Cache Accounts"
 130:  #Assign Object Cache Accounts
 131:  $WebApp.Properties["portalsuperuseraccount"] = $PortalSuperUser
 132:  $WebApp.Properties["portalsuperreaderaccount"] = $PortalSuperReader
 133:  Write-Progress -Activity "Creating Web Application" -Status "Creating Object Cache User Policies for Web Application"
 134:  #Create a New Policy for the Super User
 135:  $SuperUserPolicy = $WebApp.Policies.Add($PortalSuperUser, "Portal Super User Account")
 136:  #Assign Full Control To the Super User
 137:  $SuperUserPolicy.PolicyRoleBindings.Add($WebApp.PolicyRoles.GetSpecialRole([Microsoft.SharePoint.Administration.SPPolicyRoleType]::FullControl))
 138:  #Create a New Policy for the Super Reader
 139:  $SuperReaderPolicy = $WebApp.Policies.Add($PortalSuperReader, "Portal Super Reader Account")
 140:  #ASsign Full Read to the Super Reader
 141:  $SuperReaderPolicy.PolicyRoleBindings.Add($WebApp.PolicyRoles.GetSpecialRole([Microsoft.SharePoint.Administration.SPPolicyRoleType]::FullRead))
 142:  Write-Progress -Activity "Creating Web Application" -Status "Updating Web Application Properties"
 143:  #Commit changes to the web application
 144:  $WebApp.update()
 145:  }
 146:  }

I save the file with the filename CreateWebApplication.ps1.

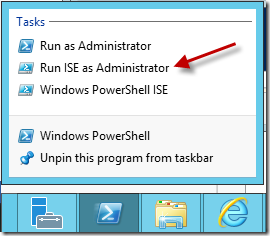
I right-clicked on the Windows PowerShell icon on the taskbar and clicked on Run ISE as Administrator.
clip_image131

The Administrator: Windows PowerShell ISE window opens. I click on File \ Open

clip_image133

I click on the CreateWebApplication.ps1 file and click Open. The script opens in the workspace.

clip_image135

I click on the Run Script icon.

clip_image137

The script ran with a single warning displayed.

clip_image139

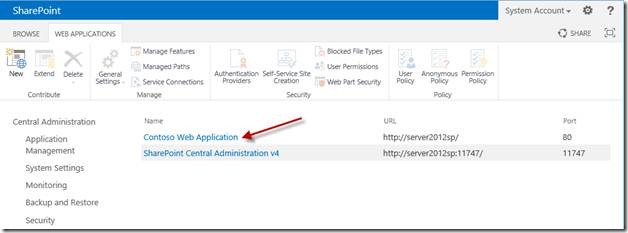
I validate that the web application was created by opening the Central Administration web page and clicking on Manage web applications in the Web Applications section. You should see the new web application listed by name.
clip_image141

I select the Contoso Web Application and click on User Policy. The Policy for Web Application screen is displayed. I review the displayed accounts and permissions. I click OK to close the screen.

clip_image142

I will validate that the database for the web application was created by opening the Central Administration web page and clicking on Manage content databases in the Databases section. You should see the new database listed by name.

clip_image144

I also check that the database is created in SQL Server Management Studio on my SQL Server.
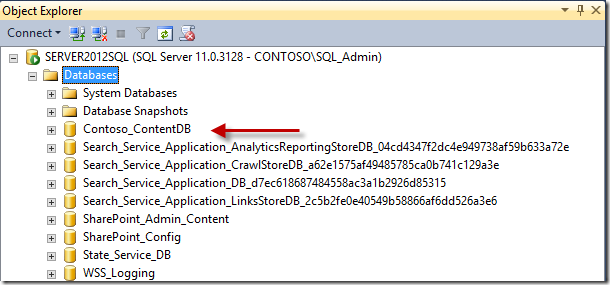
image

Conclusion

There is more that I can do; but I am going to end here. I set out and accomplished what I wanted to do. All three servers are operational. I have a new SharePoint 2013 environment that is a much better match for what I would see in a production environment. I could always squeeze in another server if I need an App Server or independent Search Server. I will do my best to keep track of any issues that come up and blog about them.

I will make corrections in these blog entries as needed. I already made a few corrections that pertained to problems with some PowerShell scripts that I ran.

There are certainly several blogs that have details on SharePoint 2013 installations. I hope that the details that I included help anyone interested.

As a reminder, I am separating the details into four blog posts:

Installing and Configuring a Three-Server SharePoint 2013 Environment: Part 1 of 4

Installing and Configuring the Windows Domain Controller: Part 2 of 4

Installing and Configuring SQL Server 2012: Part 3 of 4

Installing and Configuring SharePoint 2013: Part 4 of 4

Installing and Configuring SQL Server 2012: Part 3 of 4

This bog entry provides the details on installing and configuring SQL Server 2012 Standard on a Windows 2012 server. I have installed SQL Server many times over the years. This time I separated the installation onto two virtual disk drives.

This is a copy of the blog post that I originally posted here:

Installing and Configuring SQL Server 2012: Part 3 of 4

As a reminder, I am separating the details into four blog posts:

Installing and Configuring a Three-Server SharePoint 2013 Environment: Part 1 of 4
Installing and Configuring the Windows Domain Controller: Part 2 of 4
Installing and Configuring SQL Server 2012: Part 3 of 4

Installing and Configuring SharePoint 2013: Part 4 of 4

I setup another VMWare virtual machine for SQL Server 2012. I plan to configure it as below.

SQL Server

  • Windows Server 2012
  • SQL Server 2012 Standard SP1
  • Memory: 8GB RAM
  • CPU: 4
  • Drive: 1x80GB, 1x40GB
  • IP Address: 192.168.67.12
  • Domain: contoso.com
  • Name: server2012sql
  • Target Drive: 2 (OS and SQL Server install)
  • Target Drive: 1 (Database install)

Note the following in the Virtual Machine Settings. I set up one processor with four cores.

clip_image002

Add a Second Hard Disk

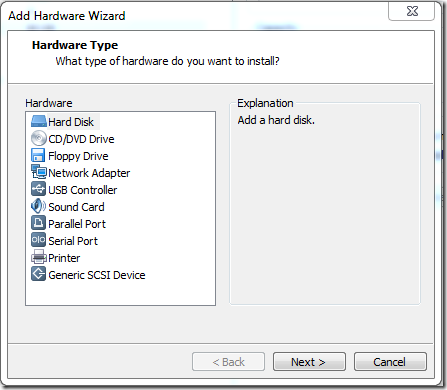
I set up a second Hard Disk by clicking on Add… at the bottom of the Virtual Machine Settings screen. The Add Hardware Wizard screen appears. I select Hard Disk and click Next.

clip_image003

I click Create a new virtual disk in the Select a Disk screen and click Next.

clip_image004

I leave the settings in the Select a Disk Type screen as is and click Next.

clip_image005

I change the Maximum disk size to 40.0 in the Specify Disk Capacity screen and click Next to continue.

clip_image006

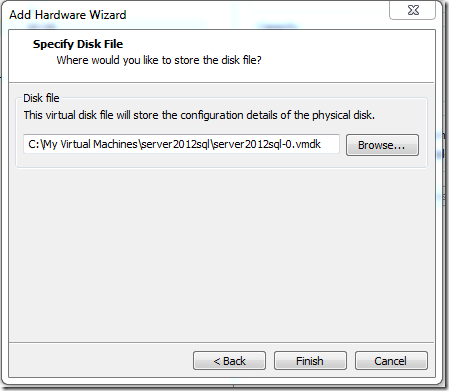
I specify the location and filename for the virtual disk file in the Specify Disk File screen. I click Finish to continue.

clip_image007

I click OK to close the Virtual Machine Settings screen. I want to restart the server to apply the changes. I click on Local Server.

clip_image008

I click on Tasks and select Shut Down Local Server.

clip_image009

I select Restart on the What do you want the computer to do? drop down list. I change the option to Hardware: Installation (Planned), add a comment, and click OK to continue.

clip_image010

The server restarts. I logon with the local Admin account. I click on Tools \ Computer Management to finish adding the second disk.

clip_image011

The Computer Management screen appears. I click on Storage \ Disk Management.

clip_image013

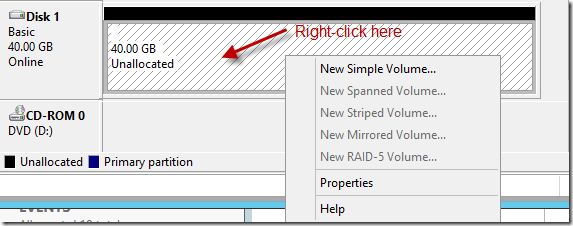
I right-click on Disk 1 and select Online.

clip_image014

The status of the drive changes to “Not Initialized”.

clip_image015

I right-click again and select Initialize Disk.

clip_image016

The Initialize Disk screen appears. I leave the settings as is and click OK to continue.

clip_image017

The status of the drive changes to Online.

clip_image018

I right-click on the drive and select New Simple Volume.

clip_image019

The New Simple Volume Wizard screen appears. I click Next to continue.

clip_image020

I leave the settings in the Specify Volume Size screen as is and click Next to continue.

clip_image021

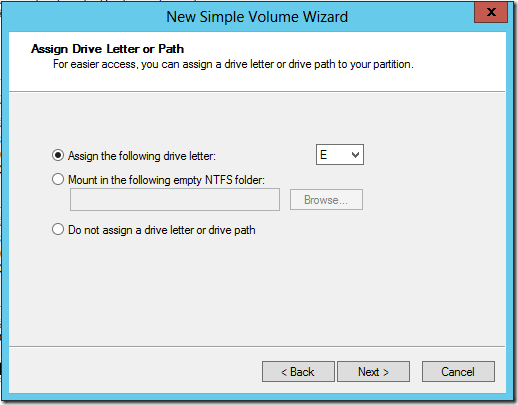
I leave the settings in the Assign Drive Letter or Path as is and click Next to continue.

clip_image022

I change the Volume Label in the Format Partition screen and click Next to continue.

image

I click Finish in the Completing the New Simple Volume Wizard screen.

clip_image023

The second hard disk appears in the list.

clip_image025

I close the Computer Management screen.

Change the Server Name and the IP Address

I want to change the server name and IP address. I click on Local Server.

clip_image026

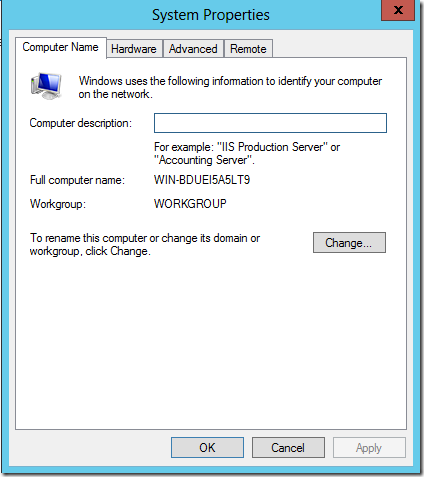
I click on the displayed computer name and the System Properties appears.

clip_image027

I click on Change and the Computer Name / Domain Changes dialog box is displayed. I update the computer name as displayed below. I click OK to continue. I will update the domain later.

Computer name: server2012sql

clip_image028

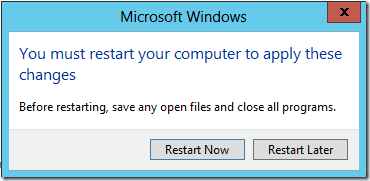
I click OK when asked to restart the computer.

clip_image029

I click on Close to close the Systems Properties screen.

clip_image030

I click on Restart Now.

clip_image031

The computer immediately restarts. I confirm that the computer name has changed.

clip_image032

I click on the Ethernet setting to change the IP address.

clip_image033

The Network Connections screen is displayed.

clip_image034

I double-click on the Ethernet icon and the Ethernet Status window is displayed.

clip_image035

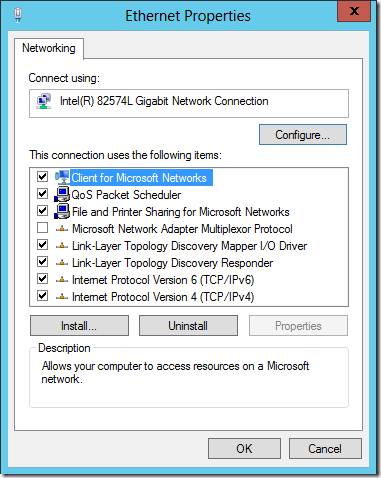
I click on Properties and the Ethernet Properties dialog box is displayed.

clip_image036

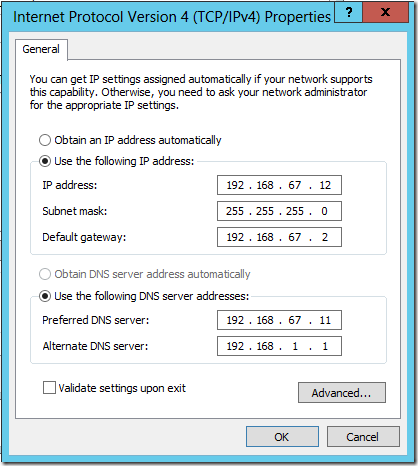
I click on Internet Protocol Version 4 and Properties. I select Use the following IP address and enter the IP address displayed below. Note that I added the Domain Controller server as the preferred DNS server address and I added the IP address of my home router as the alternate DNS server. I click OK to accept the changes and continue.

clip_image037

I click Close to close the Ethernet Properties dialog box.

I click Close to close the Ethernet Status dialog box.

I close the Network Connections window and I am returned to the Local Server dashboard. I can see that my change is applied.

clip_image038

I click on WORKGROUP in the Properties display.

clip_image039

The System Properties screen is displayed again.

clip_image040

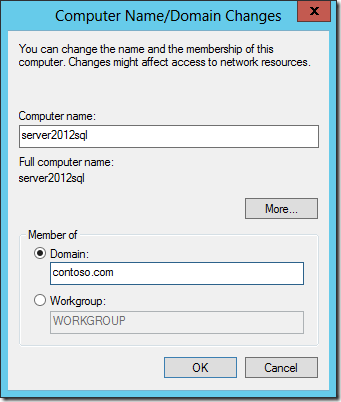
I click on Change… and the Computer Name / Domain Changes screen is displayed. I select Domain and enter contoso.com. I click OK to continue.

clip_image041

The Windows Security screen appears. I enter the Administrator account on the domain controller and click OK to continue.

clip_image042

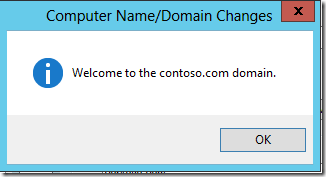
A Welcome screen appears. I click OK to close the screen.

clip_image043

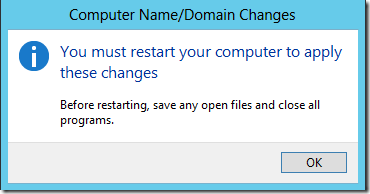
I click OK to restart the computer.

clip_image044

The System Properties screen shows the updated Domain. I click Close to close the System Properties screen.

clip_image045

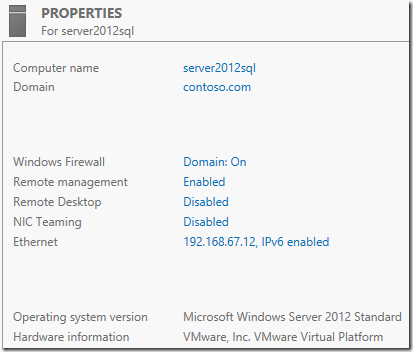
I can see that the Local Server properties is also updated.

clip_image046

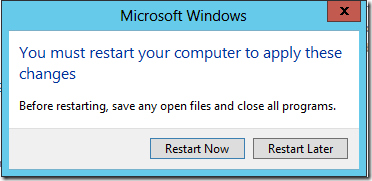
I click Restart Now on the Restart screen to restart the server.

clip_image047

The server restarts immediately. I logon with the local Admin account. I check the Local Server Properties.

clip_image048

I want to add SQL_Admin as a Local Administrator on the SQL Server. I click on Tools \ Computer Management.

The Computer Management screen opens and I select Local Users and Groups. I expand and select Groups.

clip_image050

I double-click on Administrators and the Administrators Properties screen appears.

clip_image051

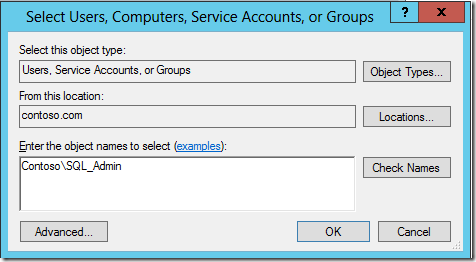
I click on Add… and add Contoso\SQL_Admin to the Enter the object names to select box.

clip_image052

I click Check Names and the Windows Security screen appears. I enter the credentials for Administrator and click OK.

clip_image053

The name is validated. I click OK to continue.

clip_image054

The SQL_Admin account appears as a member of the Administrators group.

clip_image055

I click OK to close the Administrators Properties screen. I close the Computer Management screen.

Windows Firewall

I need to configure Windows Firewall to open a port for SQL Server.

I click on Domain: On beside Windows Firewall in Server Manager \ Local Server.

clip_image056

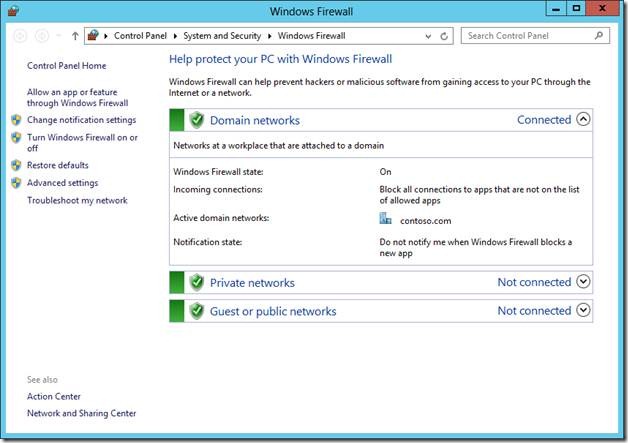
The Windows Firewall screen opens.

clip_image058

I click on Advanced Settings

clip_image059

The Windows Firewall with Advanced Security screen opens.

clip_image061

I click on Inbound Rules

clip_image062

I click on New Rule … under Actions on the right menu

clip_image063

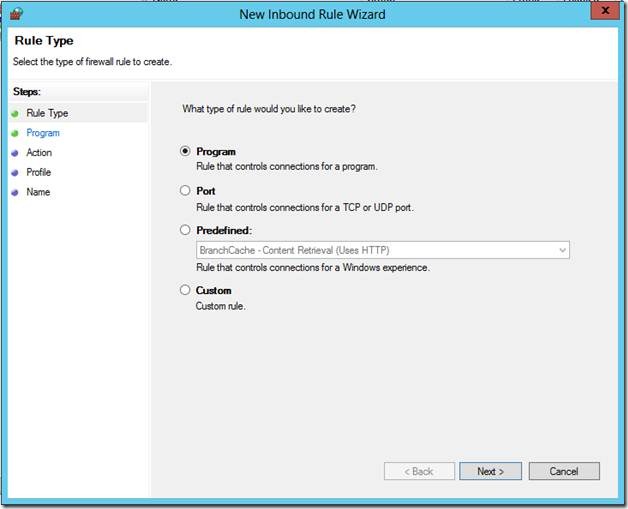
The New Inbound Rule Wizard screen appears.

clip_image065

I select Port and click Next.

clip_image066

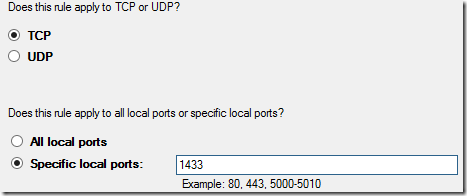
I keep TCP selected and enter 1433 as the local port. I click Next to continue.

clip_image067

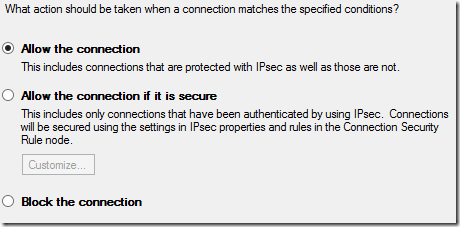
I keep Allow the connection selected and click Next to continue.

clip_image068

I keep all of the settings on the screen and click Next to continue.

clip_image069

I enter values for Name and Description and click Finish.

clip_image070

The Inbound Rule is saved. I will create additional Inbound Rules:

Port

Description

TCP 2383

Microsoft SQL Server 2012 Analysis Services with Default instance

TCP 2382

SQL Server Browser service

TCP xxxx

SQL Server 2011 Analysis Services (if used)

TCP 80

SQL Server 2012 Reporting Services (SSRS)
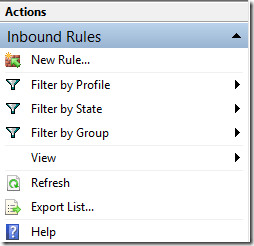
TCP 135

SQL Server 2012 Integration Services (SSIS)
I close the Windows Firewall with Advanced Security screen.

I close the Windows Firewall screen.

Install SQL Server 2012

I click on VM \ Settings on the VMWare toolbar.

clip_image071

The Virtual Machine Settings screen appears.

clip_image072

I click on Add… and the Add Hardware Wizard screen appears. I click on CD\DVD Drive and click Next.

clip_image073

I select Use ISO image and click Next.

clip_image074

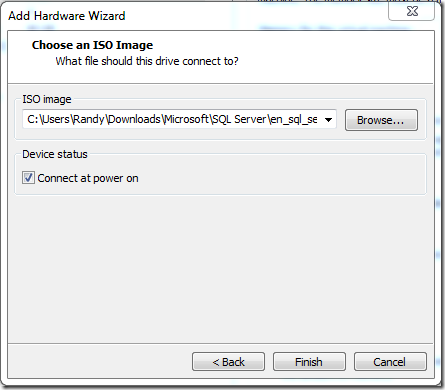
I browse to the ISO image (en_sql_server_2012_standard_edition_with_sp1_x64_dvd_1228198.iso) that I have for SQL Server 2012 Standard. I click Finish to continue.

clip_image075

I click OK to close the Virtual Machine Settings screen. A message appears in the top right corner of the screen. I ignore it for now (because I want to switch user accounts).

clip_image076

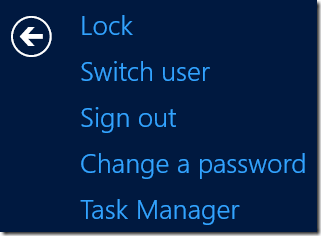
I click CTRL-ALT-DEL in the VMWare toolbar. I click Switch user in the screen.

clip_image077

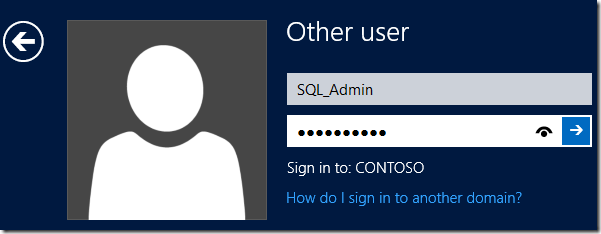
I click Other user.

clip_image078

I enter the credentials for SQL_Admin and click the arrow.

clip_image079

I click the Libraries folder on the task bar at the bottom of the screen.

clip_image080

The Drive Tools screen appears. I select the F: drive that I just mapped to the SQL Server ISO file.

clip_image082

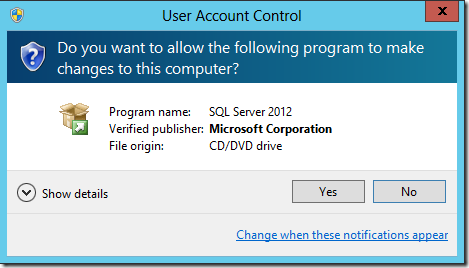
I double-click the setup file. The User Account Control screen appears and I click Yes to continue.

clip_image083

The installation process begins.

clip_image084

The SQL Server Installation Center screen appears.

clip_image086

I click on Installation and New SQL Server stand-alone installation ….

clip_image088

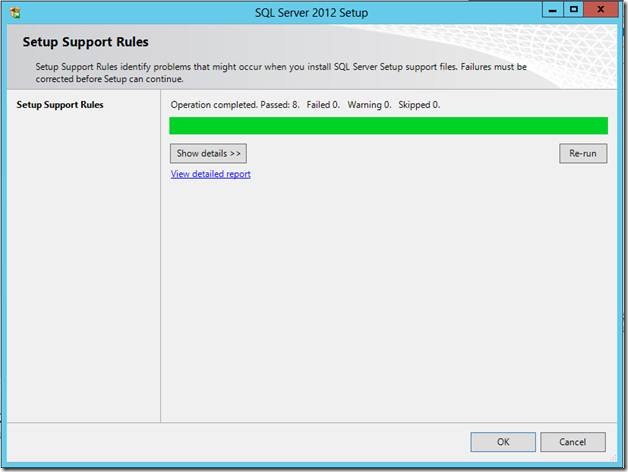
The Setup Support Rules screen opens. It shows that all rules passed. I click OK to continue.

clip_image090

The Product Key screen is displayed, I enter a product key, and I click Next to continue.

clip_image092

The License Terms screen is displayed. I click on I accept the license terms and click Next to continue.

clip_image094

I see two recommended product updates on the Product Updates screen. I click Next to continue.

clip_image096

The installation process continues.

clip_image097

A message box appeared during the installation. I clicked OK to close it and continue.

clip_image098

Another message briefly appeared and then closed.

clip_image099

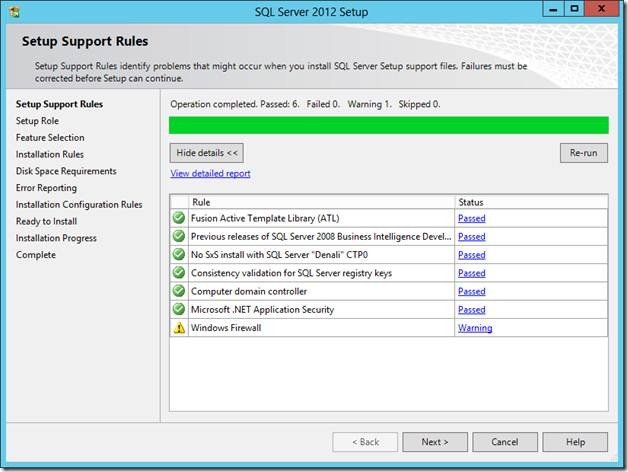
The Setup Support Rules screen lists warnings. There is one warning about Windows Firewall; but I already made the required changes. I click Next to continue.

clip_image101

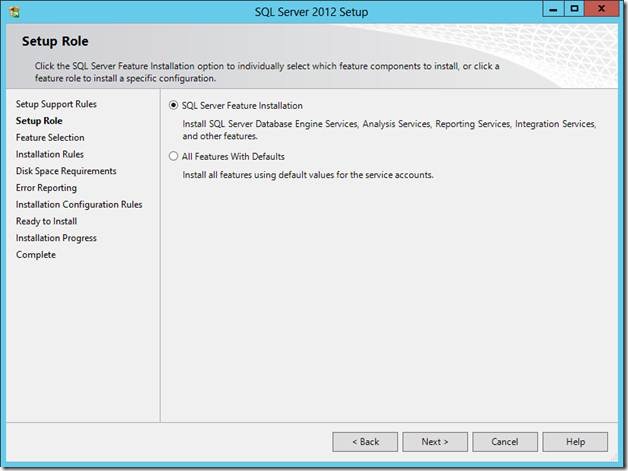
The Setup Role screen appears. I leave the settings as is (because I want to customize and configure). I click Next to continue.

clip_image103

The Feature Selection screen appears. I select the following Microsoft SQL Server 2012 features for a fast SQL Server setup :

  • Database Engine Services
  • Client Tools Connectivity
  • Client Tools Backwards Compability
  • Management Tools – Basic

I change the directories to point to my second drive (E). I click Next to continue.

clip_image105

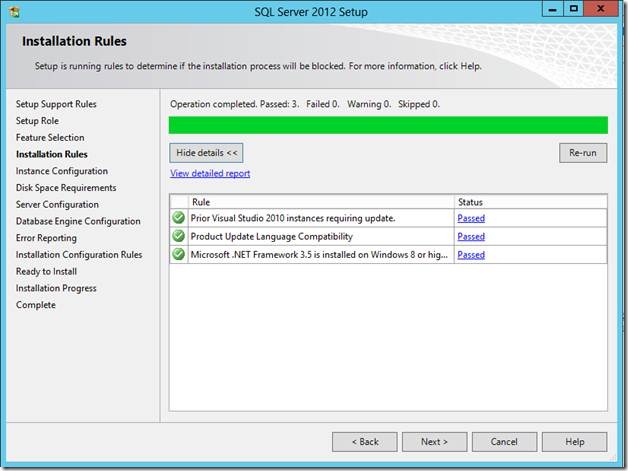
The Installation Rules screen appears. I click on Show Details to see the details. I click Next to continue.

clip_image107

Note: I did have a problem reported with installing Microsoft .NET Framework 3.5 one time. I did not get the problem again when I added my home router as the second DNS server in the IP address configuration. So I think the solution is to have an Internet connection available to the Windows 2012 Server.

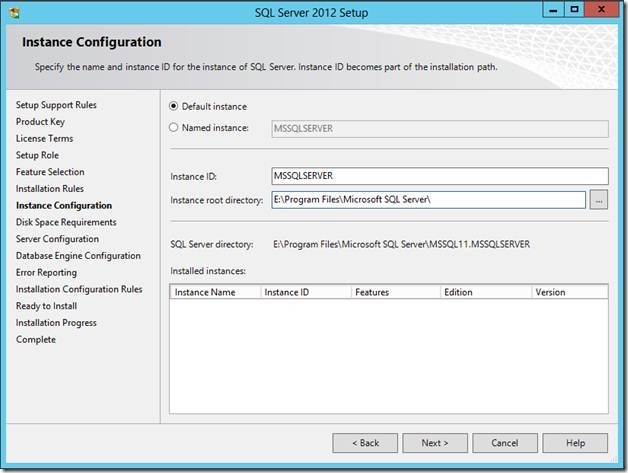
The Instance Configuration screen opens. I change the Instance root directory to point to the second drive (E). I click Next to continue.

clip_image109

The Disk Space Requirements screen displays the disk summary. I know that I have plenty of disk space (for now). I click Next to continue.

clip_image111

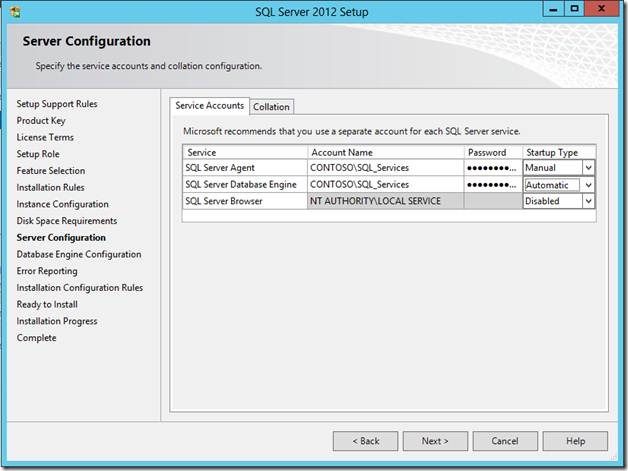
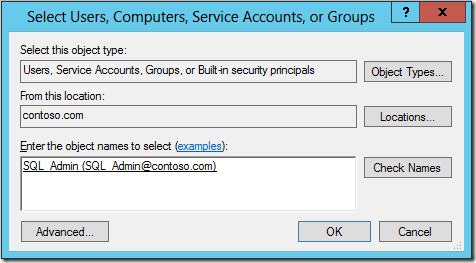
The Server Configuration screen opens. I change the settings by changing two of the account names and include the passwords. I display the Locations and Select User screens below.

clip_image112

clip_image113

I click Next in the Server Configuration screen to continue.

clip_image115

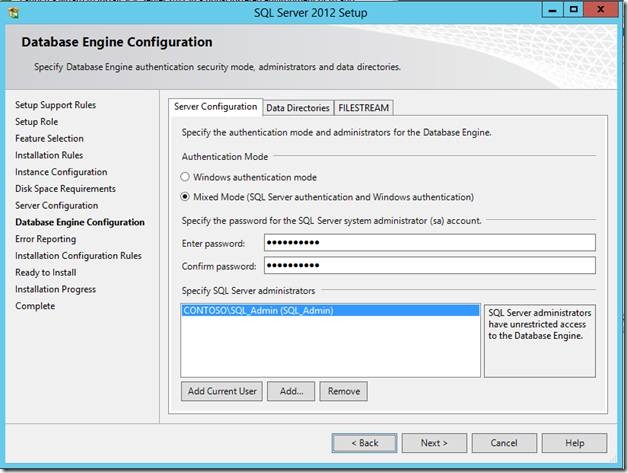
The Database Engine Configuration screen opens. I add Contoso\SQL_Admin as a SQL Server Administrator.

clip_image116

I select Mixed Mode and enter the password for the SQL Server system administrator. I click Next in the Database Engine Configuration screen to continue.

clip_image118

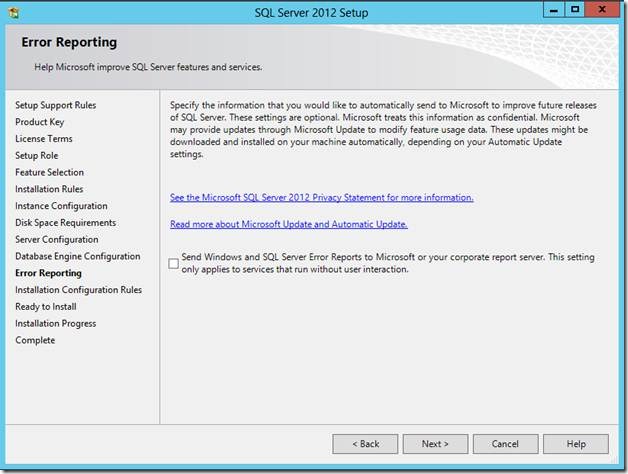
The Error Reporting screen opens. I click Next to continue.

clip_image120

The Installation Configuration Rules screen opens. I click Show Details to see the details. I click Next to continue.

clip_image122

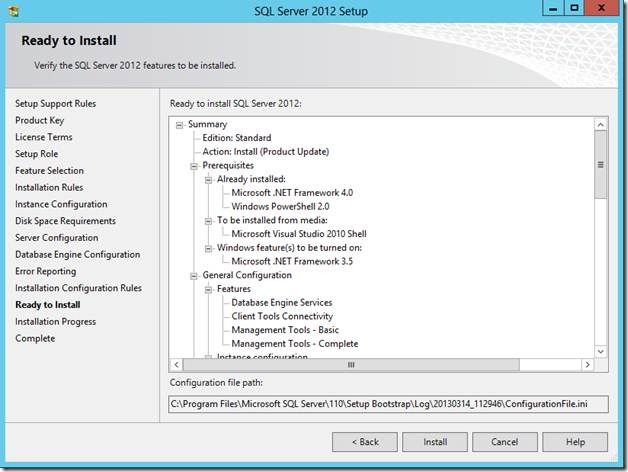
The Ready to Install screen opens. I click Install to continue.

clip_image124

The Installation Progress screen opens and the installation process begins.

clip_image125

As a side note, my Lenovo ThinkPad looks like it is working for a change.

clip_image126

The Complete screen appears. The status of every feature is Succeeded. I click Close and the screen closes.

clip_image128

I close the SQL Server Installation Center screen.

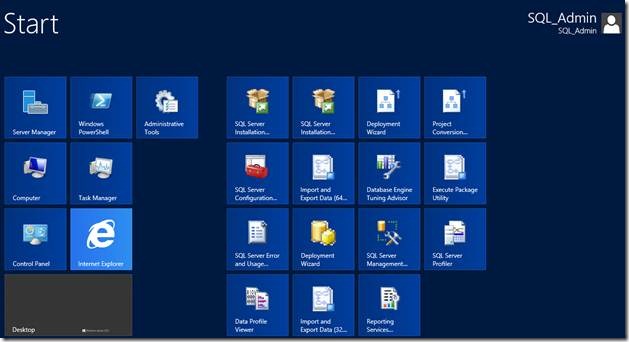
I click on the Windows Start button on the keyboard. I can see new icons for SQL Server programs. I click on the [ESC] key on the keyboard.

clip_image130

Max Degree of Parallelism Setting

I need to change the setting for max degree of parallelism. I click on the SQL Server Management icon.

clip_image131

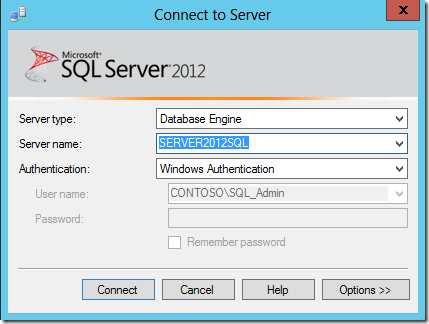
SQL Server Management Studio starts up. The Connect to Server screen is displayed. I click Connect.

clip_image132

The Object Explorer pane shows the SQL Server listed.

clip_image133

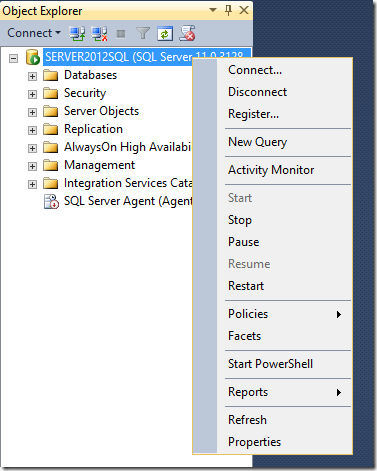
I right click on the SQL Server SERVER2012SQL and select Properties.

clip_image134

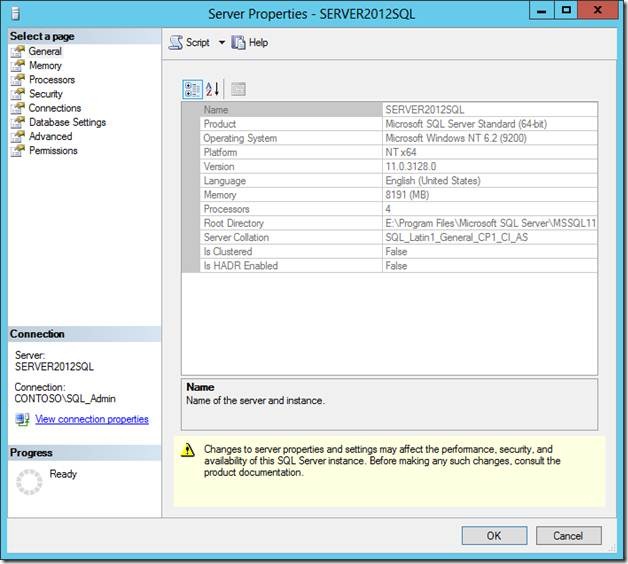
The Server Properties screen appears.

clip_image136

In the Select a page section, I click Advanced. I scroll to the bottom and change the Max Degree of Parallelism value from 0 to 1. I click OK to continue. I keep the Microsoft SQL Server Management Studio screen open for the next step.

clip_image138

SQL Permissions for sp_install

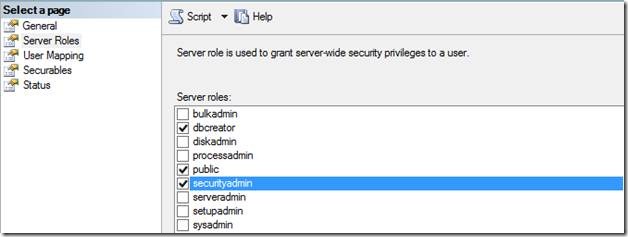
I need to set the following roles on the SQL Server for sp_install:

  • DB_Creator
  • Security_Admin
  • Public

In the Object Explorer, I expand Security and Logins.

clip_image139

I right-click on Logins and select New Login.

clip_image140

The Login – New screen appears. I enter the account (CONTOSO\sp_install) that I will use for the SharePoint installation into the Login name field.

clip_image141

clip_image143

I click on Server Roles and select dbcreator and securityadmin. I keep public selected. I click OK to continue. The screen closes.

clip_image145

SQL Permissions for sp_farm

I need to set the following roles on the SQL Server for sp_farm:

  • DB_Creator
  • Security_Admin
  • Public

In the Object Explorer, I expand Security and Logins.

clip_image139[1]

I right-click on Logins and select New Login.

clip_image140[1]

The Login – New screen appears. I enter the account (CONTOSO\sp_farm) that I will use for the SharePoint farm administrator into the Login name field.

clip_image147

I click on Server Roles and select dbcreator and securityadmin. I keep public selected. I click OK to continue. The screen closes.

clip_image145[1]

I close the Microsoft SQL Server Management Studio screen.

This concludes the installation and configuration of SQL 2012 Server.

As a reminder, I am separating the details into four blog posts:

Installing and Configuring a Three-Server SharePoint 2013 Environment: Part 1 of 4

Installing and Configuring the Windows Domain Controller: Part 2 of 4

Installing and Configuring SQL Server 2012: Part 3 of 4

Installing and Configuring SharePoint 2013: Part 4 of 4


Installing and Configuring the Windows Domain Controller: Part 2 of 4

Installing a Windows Domain Controller is a relatively easy task. I also provide a list of service accounts to create for the new environment.

This is a copy of the blog post that I originally posted here:

Installing and Configuring the Windows Domain Controller: Part 2 of 4


As a reminder, I am separating the details into four blog posts:

Installing and Configuring a Three-Server SharePoint 2013 Environment: Part 1 of 4
Installing and Configuring the Windows Domain Controller: Part 2 of 4
Installing and Configuring SQL Server 2012: Part 3 of 4

Installing and Configuring SharePoint 2013: Part 4 of 4


I downloaded Windows Server 2012 (64-bit) from MSDN. I plan to perform the following tasks

  • Install operating system
  • Add Active Directory Domain Services (ADDS)
  • Add DNS
  • Add domain groups and users

I create a custom Virtual Machine in VMWare Workstation. I click on Create a New Virtual Machine.

clip_image001

I click Next to continue.

clip_image002

The New Virtual Machine Wizard screen is displayed. I click Next to continue.

clip_image003

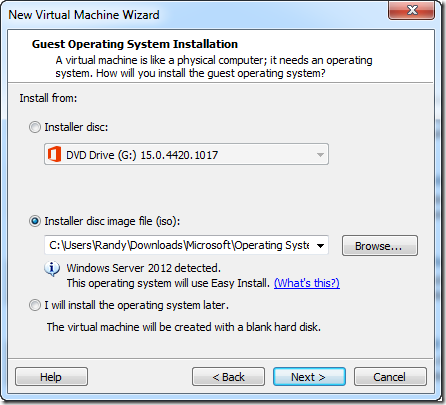
I select the Installer disc image file (iso) and select the Windows Server 2012 iso file. I click Next to continue.

clip_image004

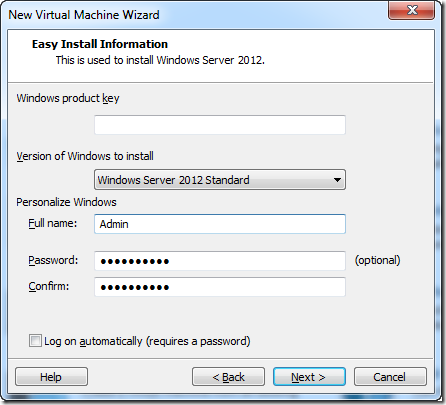
I enter the Windows product key, select Server 2012 Standard, enter Admin in the Full Name field and a password: pass@word1. I click Next to continue.

clip_image005

I enter the Virtual machine name and Location. I click Next to continue.

clip_image006

I keep the Processor Configuration settings as is and click Next.

clip_image007

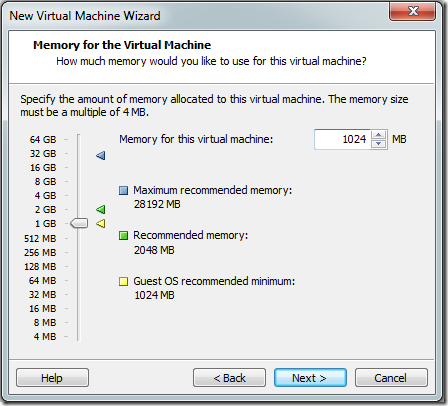
I change the memory setting to 1024 and click Next.

image

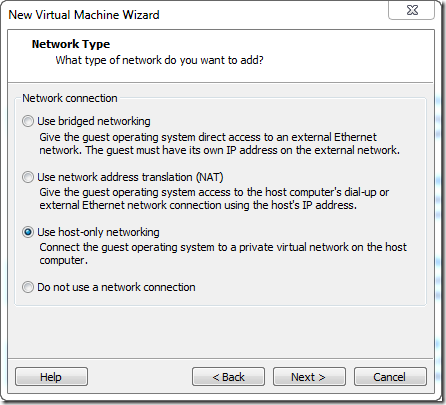
I select Use host-only networking and click Next.

clip_image008

I keep the Controller Type settings as is and click Next.

clip_image009

The Select a Disk screen appears. I want to Create a new virtual disk and click Next.

clip_image010

I keep SCSI selected and click Next.

clip_image011

I change the Maximum disk size to 32.0 and keep the Split virtual disk into multiple files setting. I click Next.

clip_image012

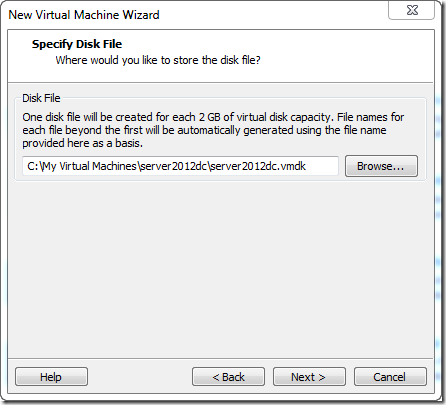
I update the Disk File setting and click Next.

clip_image013

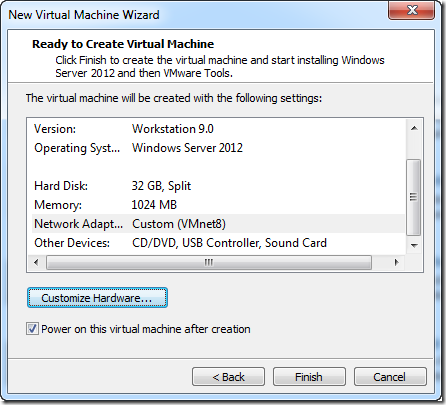
I click Customize Hardware on the Ready to Create Virtual Machine and remove the Floppy and Printer devices.

clip_image015

I click on the Network Adapter and change the Network Connection setting to Custom and select VMnet8 (NAT) in the drop down list. I click Close to continue.

clip_image016

I click Finish in the Ready to Create Virtual Machine window.

clip_image017

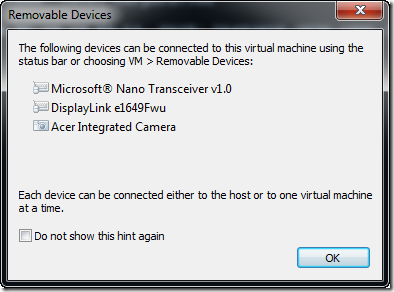
I close the Removable Devices window by clicking OK.

clip_image018

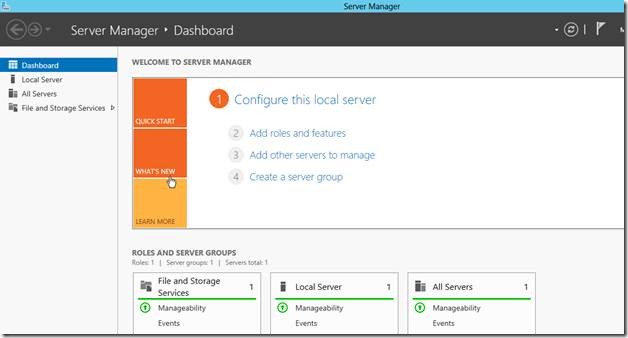
Installation continues until the operating system is installed. The server reboots and the Server Manager \ Dashboard is displayed.

clip_image020

clip_image022

Change the Server Name and the IP Address

I want to change the server name and IP address. I click on Local Server.

clip_image023

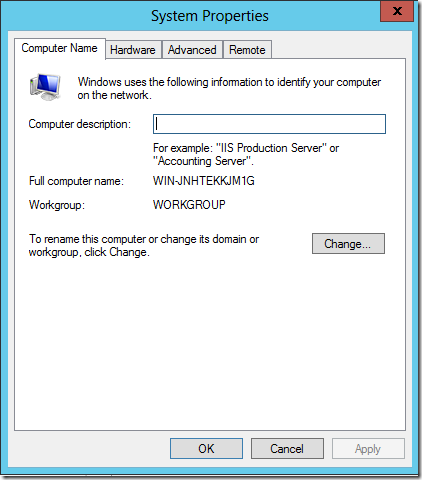
I click on the displayed computer name and the System Properties screen appears.

clip_image024

I click on Change and the Computer Name / Domain Changes dialog box is displayed. I update the computer name as displayed below. I click OK to continue. I will update the domain later.

Computer name: server2012dc

clip_image025

I click OK when asked to restart the computer.

clip_image026

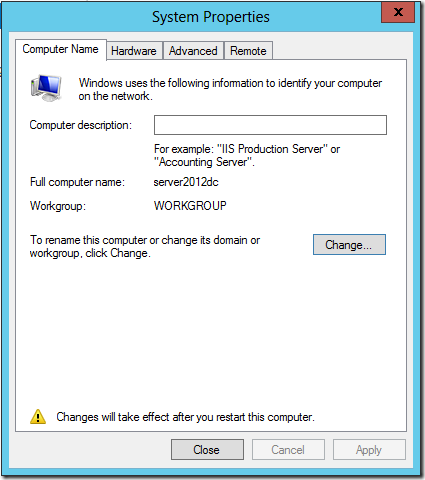
I click on Close to close the Systems Properties.

clip_image027

I click on Restart Now.

clip_image028

The computer immediately restarts. I confirm that the computer name has changed.

clip_image029

I click on the Ethernet setting to change the IP address.

clip_image030

The Network Connections screen is displayed.

clip_image031

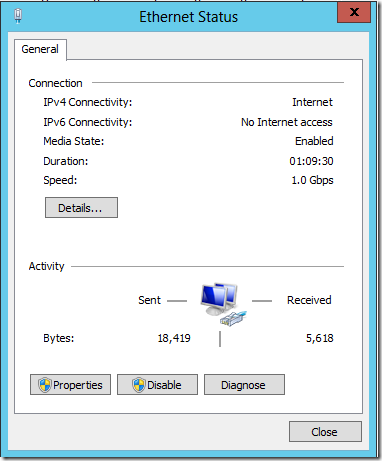
I double-click on the Ethernet icon and the Ethernet Status window is displayed.

clip_image032

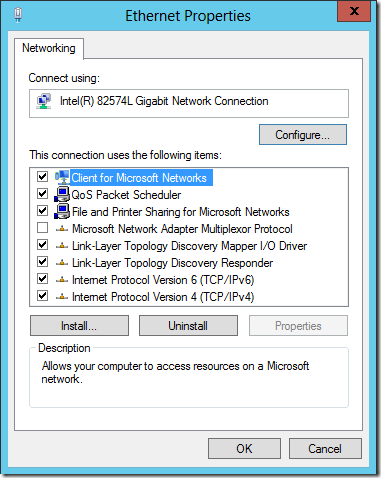
I click on Properties and the Ethernet Properties dialog box is displayed.

clip_image033

I click on Internet Protocol Version 4 and Properties. I select Use the following IP address and enter the IP address displayed below. I click OK to accept the changes and continue.

clip_image034

I click Close to close the Ethernet Properties dialog box.

I click Close to close the Ethernet Status dialog box.

I close the Network Connections window and I am returned to the Local Server dashboard.

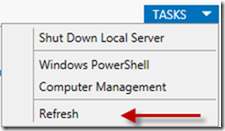
I click on Tasks \ Refresh to update the dashboard.

image

I can see that my change is applied.

clip_image035

Active Directory Domain Services

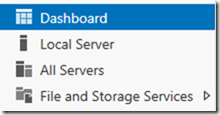
I want to add AD DS now. I click on the Dashboard link on the left.

clip_image036

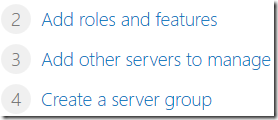
I click on “2 Add roles and features”

clip_image037

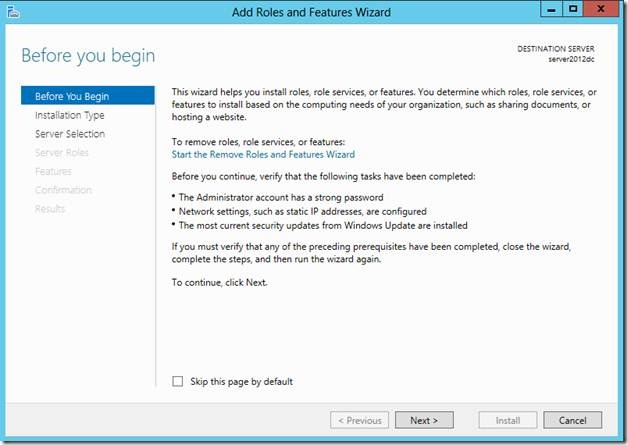
The Add Roles and Features Wizard opens. I just set the static IP address. I click Next to continue.

clip_image039

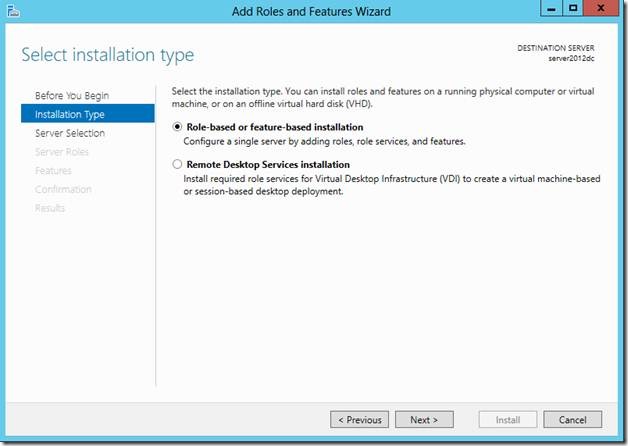
I keep the Role-based … selection and click Next

clip_image041

I make no changes to the next screen and click Next

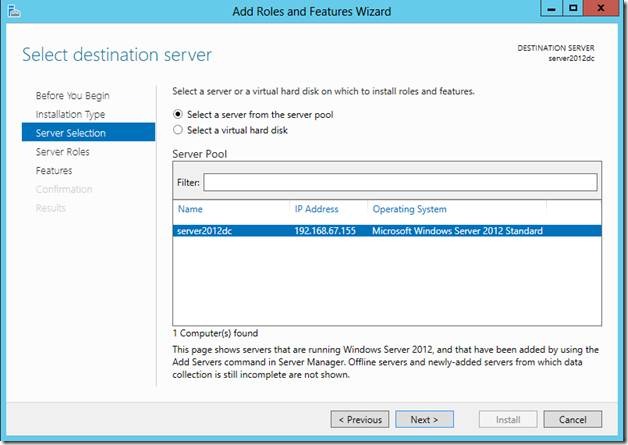
clip_image043

I click on Active Directory Domain Services in the Add Roles and Features Wizard.

clip_image045

A new screen appears immediately. I click Add Features to continue.

clip_image046

I click Next on the Add Roles and Features Wizard to continue. The Select Features screen has Group Policy Management pre-selected. I click Next to continue.

clip_image048

The Active Directory Domain Services screen displays notes. I click Next to continue.

clip_image050

The Confirm installation sections screen appears.

clip_image052

I click on the Restart checkbox and a confirmation dialog box appears. I click Yes to continue.

clip_image053

I click Install on the Confirm Installation selections screen. The Feature installation shows the progress.

clip_image054

I click Close after seeing that installation succeeded.

clip_image055

An AD DS box appears on the Dashboard

clip_image057

Promote Server to Domain Controller

I want to promote the server to a domain controller next. I click on the flag with the warning triangle. A Post-deployment Configuration list appears.

clip_image058

I click on Promote this server to a domain controller. The Active Directory Domain Services Configuration Wizard appears.

clip_image060

I change the deployment operation to Add a new forest and enter contoso.com as the root domain name. I click Next to continue.

clip_image061

I enter a DSRM password in the next screen. I leave the rest of the settings as is and click Next to continue.

clip_image063

A warning is displayed on the DNS Options page.

clip_image065

A DNS Options warning box also appears. I click OK to continue.

clip_image066

I click Next on the DNS Options screen to continue. The Additional Options screen verifies the NetBIOS domain name. I click Next to continue.

clip_image068

I do not change the path settings in the Path screen. I click Next to continue.

clip_image070

I review the options on the Review Options screen. I click Next to continue.

clip_image070[1]

The Review Options screen is displayed. I do not have plans of running the scripts with PowerShell. I click Next to continue.

clip_image072

The Prerequisites Check runs. Unfortunately, one or more prerequisites fails.

clip_image074

I need to set a strong password for the local Administrator account. I click on Tools \ Computer Management.

clip_image075

The Computer Management windows opens. I click on Local Users and Groups.

clip_image077

I double-click on Users and the list of user accounts is displayed.

clip_image079

I right-click on Administrator and select Set Password….

clip_image080

The Set Password for Administrator dialog box is displayed. I click Proceed to continue.

clip_image081

I enter the password in both password fields in the next screen. I click OK to continue.

clip_image082

I receive a confirmation that the password is set. I click OK to close the confirmation window.

clip_image083

I close the Computer Management window and return to the AD DS Configuration Wizard. I click Rerun prerequisites check.

clip_image084

The prerequisites check passed successfully this time.

clip_image086

I click Install to continue. The process starts …

clip_image087

Installation continues with status updates displayed.

clip_image088

The server automatically restarts.

clip_image090

The server restarts. I logon with the local Admin account. The Dashboard shows the new AD DS and DNS roles.

clip_image092

I can also see the new components available under the Tools menu.

clip_image093

Service Accounts

I will install the service accounts as listed on http://www.toddklindt.com/SP2013ServiceAccounts. I also plan to install some additional service accounts as listed on http://www.absolute-sharepoint.com/2013/01/sharepoint-2013-service-accounts-best.html. I really like the details provided in both blog entries. I changed the table format to follow what was in Todd’s blog.

The Account permissions and security settings in SharePoint 2013 document (link) provides a detailed list of all of the permissions and security settings automatically added to accounts during the various installation processes.

Service Accounts Needed for a Base Install of SharePoint 2013

Account name

Role

Domain rights

Local SharePoint Server rights needed

SQL rights needed

sp_install

Used to install SharePoint binaries.

Domain User

Local administrator on all SharePoint servers (but not on SQL Server)

public, dbcreator, and securityadmin SQL roles. Need to be SysAdmin on SQL when installing the Workflow Manager

sp_farm

Farm account. Used for Windows Timer Service, Central Admin and User Profile service

Domain User

Local administrator on all SharePoint servers (but not on SQL Server)

public, dbcreator, and securityadmin SQL roles. Need to be SysAdmin on SQL when installing the Workflow Manager

sp_webapp

App pool id for content web apps

Domain User

None

None

sp_serviceapps

Service app pool id

Domain User

None

None

sp_userprofile

Account used by the User Profile services to access Active Directory

Must have Replicating Change permissions to AD. Must be given in BOTH ADUC and ADSIEDIT. If domain is Windows 2003 or early, must also be a member of the “Pre-Windows 2000” built-in group.

None

None

sp_superuser

Cache account

Domain User

Web application Policy Full Control

Web application super account setting

None

sp_superreader

Cache account

Domain User

Web application Policy Full read

Web application super reader account setting

None

sp_MySitePool

Used for the My Sites Web Application

Domain User

This account must not be a member of the Farm Administrators group.

None

Accounts Required for SQL Server
The security benefit here is that the account running the Agent and Database Engine services is not a local administrator anymore.
Name Role Domain rights Local SharePoint Server rights needed SQL rights needed
SQL_Admin SQL Admin on the SQL Server. Used to Install the SQL Server. Domain User None Local Administrator on the SQL Server
SQL_Services It is the service account for the following SQL Server services: MSSQLSERVER SQLSERVERAGENT. Domain User None Will be given necessary permissions when SQL Server is installed by a local administrator on the SQL box
Accounts Required for Search

Instead of letting The sp_content account runs both the Windows Service and have FULL-READ rights on all the web applications, the SP_Search will now run the Windows Service and the SP_Crawl account has the FULL-READ rights for crawling.

Name

Role

Domain rights

Local SharePoint Server rights needed

SQL rights needed

SP_Crawl

The Default Content Access Account for the Search Service Application

Domain User

None

None

SP_Search

Service Account to run the SharePoint Search “Windows Service”

Domain User

None

None

Accounts Required for Optional Components
Account name

Role

Domain rights

Local SharePoint Server rights needed

SQL rights needed

sql_ssas

Account that we run the SQL Server Analysis Service services as

Domain User

None

db_datareader on databases

sp_excel

Excel services unattended account.

Domain User

None

None

sp_pps

PerformancePoint Unattended account

Domain User

None

None

sp_accsvc

Access Services. Used to create all Access databases in SQL and the service account running the service app pool for the Access Service Application

Domain User

None

db_owner, public, and securityadmin

sp_workflow

The RunAs account for the Workflow Manager service

Domain User

None

None

I create all accounts in the Active Directory Users and Computers screen in the same manner. I have “Users” pre-selected.

clip_image095

I right-click in the right pane and select New \ User. I enter the details as seen in the screen below.

clip_image096

I click on Next to continue.

clip_image097

I click on Next to continue.

clip_image098

I click on Finish to continue. The New Object screen closes. I can then double-click on the new user object and edit all of the properties. For example, I can add a description.

clip_image099

I click OK to close the window. The end result looks like below.

clip_image101

I close the Active Directory Users and Computers screen.

I click on the Windows Start button on the keyboard. I can see new icons for Active Directory and DNS programs. I click on the [ESC] key on the keyboard.

clip_image103

This ends my work on the domain controller. I will leave the virtual machine up and running.

As a reminder, I am separating the details into four blog posts:

Installing and Configuring a Three-Server SharePoint 2013 Environment: Part 1 of 4

Installing and Configuring the Windows Domain Controller: Part 2 of 4

Installing and Configuring SQL Server 2012: Part 3 of 4

Installing and Configuring SharePoint 2013: Part 4 of 4


Installing and Configuring a Three-Server SharePoint 2013 Environment: Part 1 of 4

I did an install of SharePoint 2013 on a single virtual machine last summer (2012). It works; but it has some shortcomings. A single virtual machine is not an ideal representation of a real SharePoint 2013 server environment. A three server environment provides a more realistic environment. I saw how I could create the three server environment on a more powerful laptop in a presentation at the SharePoint Technical Conference in San Francisco in March, 2013.

I also felt that I should configure the firewalls, services, and service accounts with best practices in mind. I had not done so the last time.

I still wanted to use VM Workstation to run all of the virtual machines. I don’t see a lot of demos and blogs that show how to do this. So I wanted to document the details related to VMWare as much as possible.

I also try to record every step I complete with screenshots. This makes for a long blog entry. So I split the details up into multiple blog entries. On the other hand, I am not showing every problem that I encountered. Some are just simple typos or I tried something that did not work. I just fix these and move on. Basically, I am showing what worked and sometimes I note where I encountered a significant problem and my solution. I’m also posting all images in original size.

This is a copy of the blog post that I originally posted here:

Installing and Configuring a Three-Server SharePoint 2013 Environment: Part 1 of 4

I am separating the details into four blog posts:

Installing and Configuring a Three-Server SharePoint 2013 Environment: Part 1 of 4

Installing and Configuring the Windows Domain Controller: Part 2 of 4

Installing and Configuring SQL Server 2012: Part 3 of 4

Installing and Configuring SharePoint 2013: Part 4 of 4


Hardware and Software

I am installing the environment on a Lenovo ThinkPad W530 laptop (Machine Type 2447 / Model CN4). The laptop has the following hardware specifications:

CPU Intel® Core™ i7-3820QM (3.70 GHz, 8MB L3, 1333MHz FSB)
Memory 32GB RAM (2 x Crucial CT3291640 16GB kit (8GBx2), 204-pin SODIMM)
Drive 1 256GB SDD
Drive 2 512GB SDD (replaced internal CD/DVD)
Optical Drive External CD/DVD (if needed)
SDHD Card 32GB Memory Card (if needed)
Graphics NVIDIA Quadro K1000M / Intel HD Graphics 4000 – 2 GB
Display 15.6”

This laptop is by far the most powerful computer that I have ever used. It never seems to slow down for anything. I was running another virtual machine with Windows 7 most of the time while installing and configuring the three Windows 2012 servers.

I use a second monitor from AOC (model e1649fwu) that plugs into a USB port. It has a 15.6” display and I take it with when I travel. It’s like having twice the workspace! It made writing these details and taking screenshots much easier.

I have plenty of drive space on external drives if needed. I use Acronis True Image Home 2012 for daily backups.

I have the following software installed on the laptop:

  • Windows 7 Professional SP1 (64-bit)
  • Microsoft Office 2013
  • Microsoft Project 2013
  • Microsoft Visio 2013
  • Neat v5.1 SP4
  • SnagIt 9 Editor
  • VMWare Workstation 9.0.1
  • MagicISO Virtual CD/DVD Manager
  • EditPad Lite
  • AVG 2013 Anti-Virus Free

Resources

I used several resources to assist me with this installation. As already mentioned, I did a standalone installation of SharePoint 2013 on Windows Server 2008 last summer (2012). This effort will take more planning and preparation to get it right.

Title URL
Installing and Configuring SharePoint 2013 without screwing it up (too badly) http://www.slideshare.net/SPTechConSanFrancisco/how-to-install-sharepoint-2013-without-messing-it-up-by-todd-klindt-and-shane-young-stechcon
A simple install of SQL Server 2012 for SharePoint Server 2013 or 2010 http://msmvps.com/blogs/shane/archive/2012/09/17/a-simple-install-of-sql-server-2012-for-sharepoint-server-2013-or-2010.aspx
Step-by-Step Guide for Setting Up Windows Server 2012 Domain Controller http://social.technet.microsoft.com/wiki/contents/articles/12370.step-by-step-guide-for-setting-up-windows-server-2012-domain-controller.aspx
Installation SharePoint 2013 Step by Step http://social.technet.microsoft.com/wiki/contents/articles/14209.installation-sharepoint-2013-step-by-step.aspx
Service Account Suggestions for SharePoint 2013 http://www.toddklindt.com/SP2013ServiceAccounts
SharePoint 2013 Service Accounts Best Practices Explained http://www.absolute-sharepoint.com/2013/01/sharepoint-2013-service-accounts-best.html
Account permissions and security settings in SharePoint 2013 http://technet.microsoft.com/en-us/library/cc678863.aspx

My Configuration Plan

I need to keep more files on Drive 2 as it has more disk space available. This is a bit of a balancing act to spread the load. It would be nice if both of my drives were 512GB SDDs (or larger).

Domain Controller
  • Windows Server 2012
  • Memory: 1GB RAM
  • CPU: 1
  • Drive: 1x32GB
  • IP Address: 192.168.67.11
  • Domain: contoso.com
  • Name: server2012dc
  • Target Drive: 1
SQL Server
  • Windows Server 2012
  • SQL Server 2012 Standard SP1
  • Memory: 8GB RAM
  • CPU: 4
  • Drive: 1x80GB, 1x40GB
  • IP Address: 192.168.67.12
  • Domain: contoso.com
  • Name: server2012sql
  • Target Drive: 2 (OS and SQL Server install)
  • Target Drive: 1 (Database install)
SharePoint 2013 Server
  • Windows Server 2012
  • SharePoint Server 2013
  • Memory: 8GB RAM
  • CPU: 4
  • Drive: 1x80GB
  • IP Address: 192.168.67.13
  • Domain: contoso.com
  • Name: server2012sp
  • Target Drive: 2

Installing on VMWare Workstation

I am using the default VMnet8 network within VMWare.

clip_image001

I will keep the NAT settings as is. Note that the Gateway IP address is 192.168.67.2.

clip_image002

I will keep the Auto detect available DNS Servers setting.

clip_image003

I will keep the DHCP settings as is. I plan to use static IP addresses for the servers.

clip_image004

This blog entry is the shortest of the four entries.

Installing and Configuring a Three-Server SharePoint 2013 Environment: Part 1 of 4

Installing and Configuring the Windows Domain Controller: Part 2 of 4

Installing and Configuring SQL Server 2012: Part 3 of 4

Installing and Configuring SharePoint 2013: Part 4 of 4